
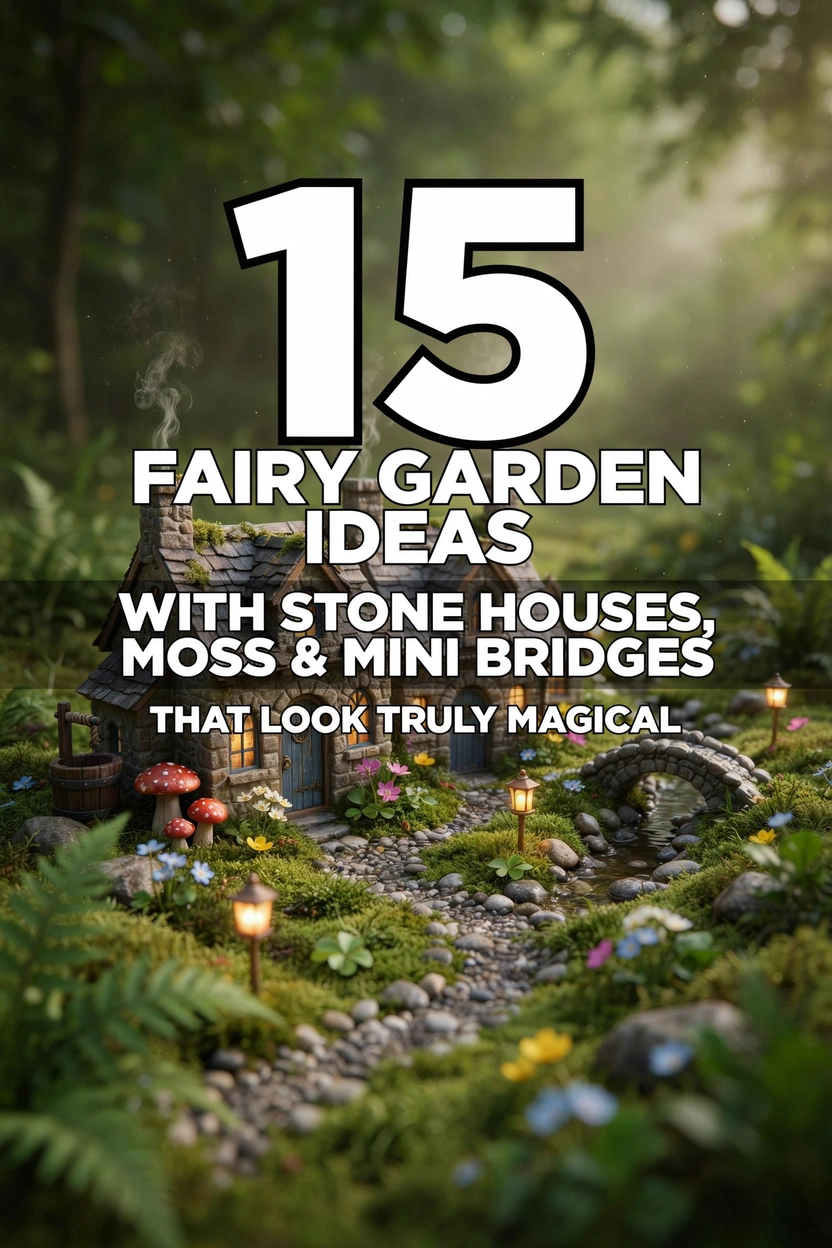
Have you ever walked past a quiet corner of someone’s garden and just… stopped? Like something tiny caught your eye, and suddenly you forgot what you were doing? That’s the magic of a fairy garden. And the best part? You don’t need a big budget or a landscaping degree to create one.
With just a few river pebbles, a patch of soft moss, a tiny stone cottage, and maybe a little bridge over a pretend stream — you can turn any forgotten corner, pot, or garden bed into something that genuinely looks enchanted. These 15 fairy garden ideas are beginner-friendly and budget-conscious. Let’s get into it.
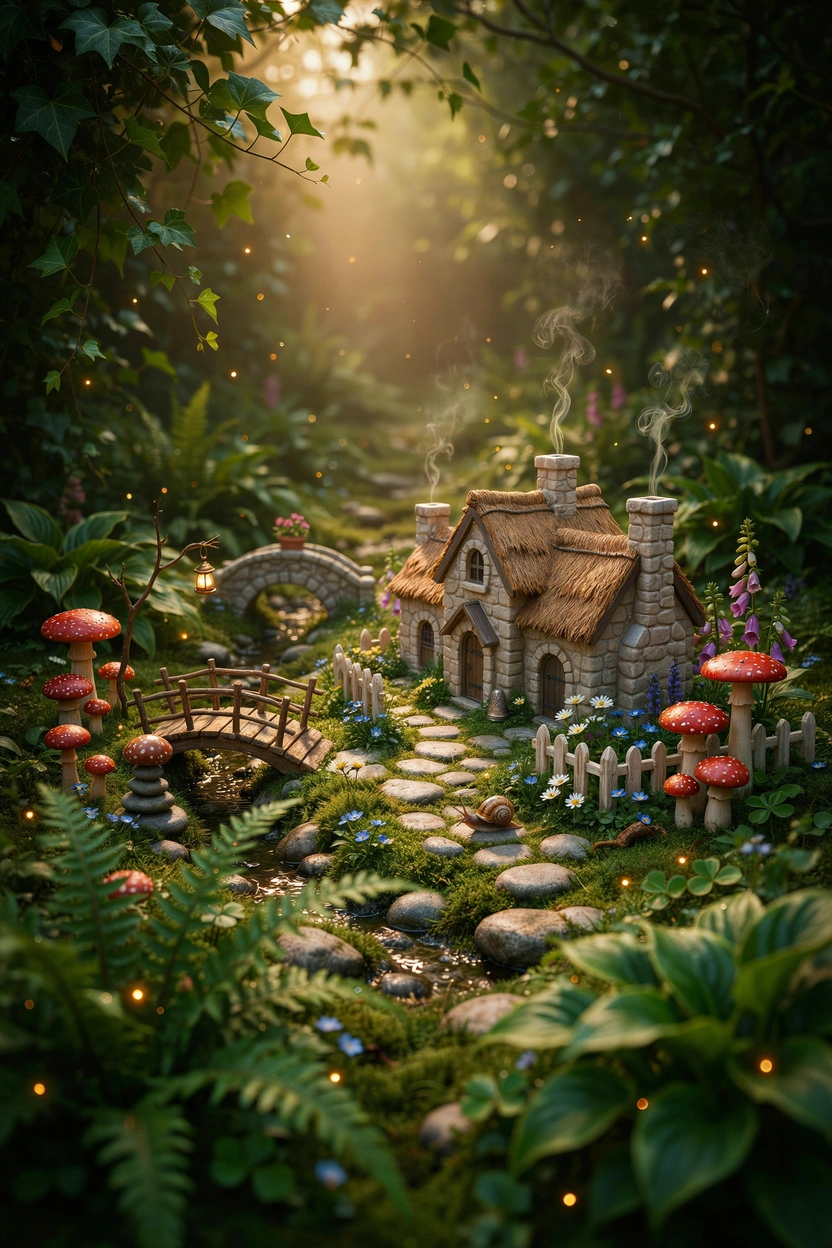
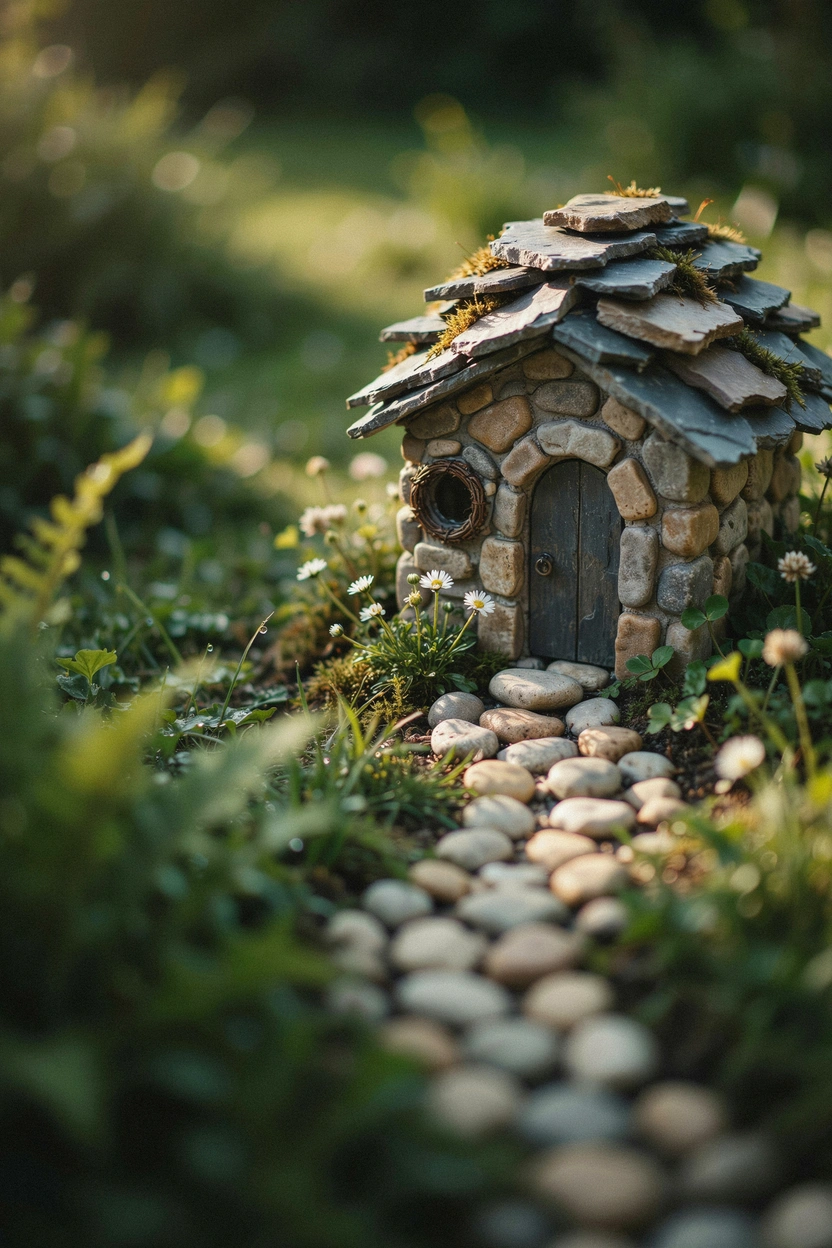
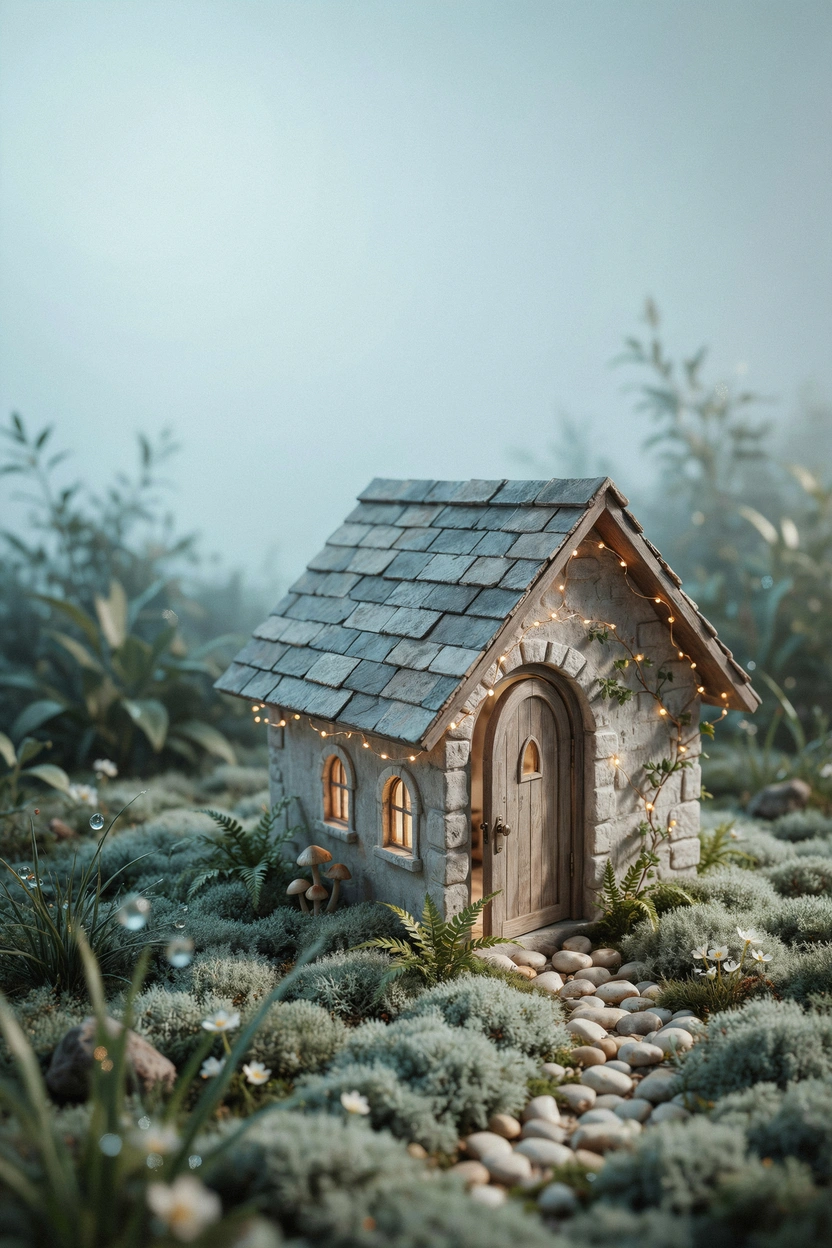
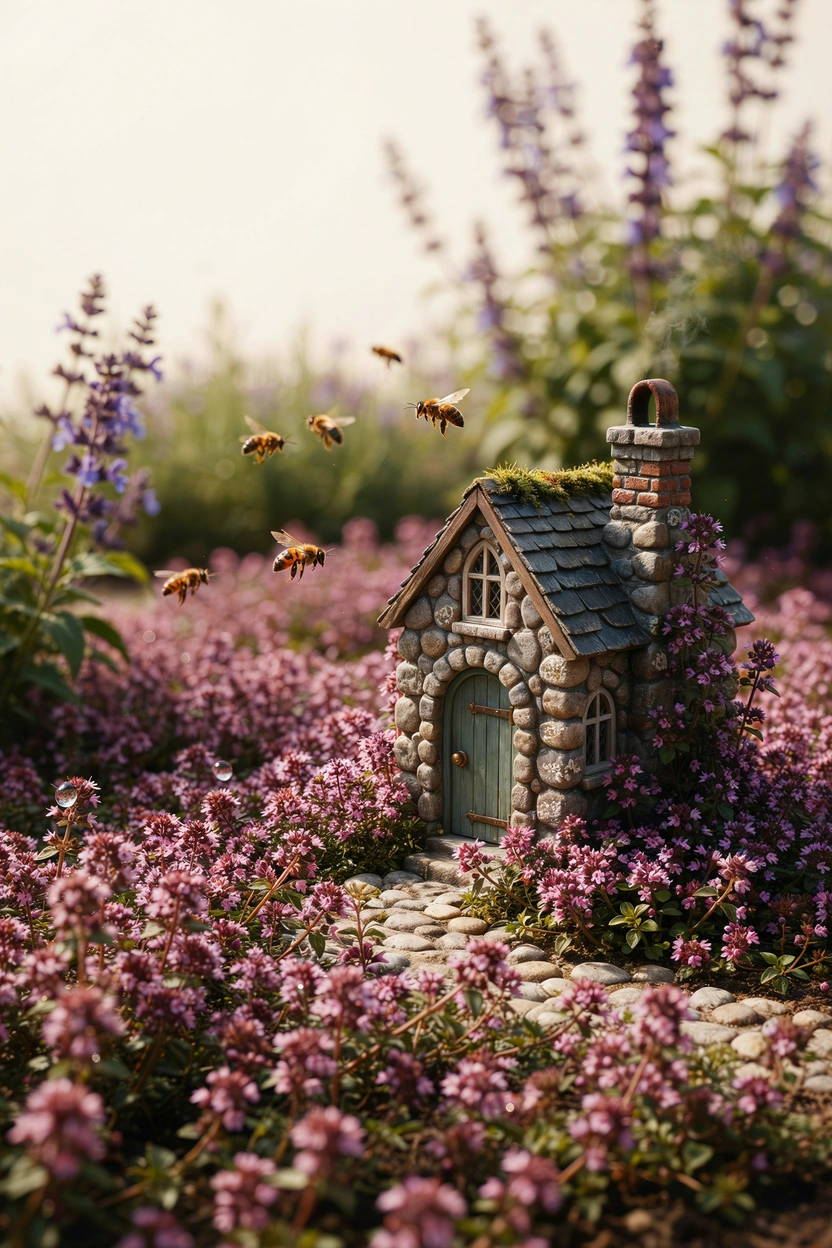
The Classic River Pebble Cottage With a Flagstone Roof
There’s a reason this one shows up on Pinterest over and over again. A small stone cottage with a layered flagstone roof just looks like it belongs in a fairy tale. Place it as the anchor of your garden and surround it with river pebbles arranged in a gentle curved path leading up to the door.
The trick is scale. Use smaller pebbles close to the house and slightly larger ones as you move outward — it creates a sense of depth and makes the whole setup feel more realistic. Add a few tiny white flowers like alyssum or baby’s breath around the base, and you’re done. Simple, stunning, and completely timeless.
Sheet Moss Ground Cover That Makes Everything Look Ancient
If you want your fairy garden to look like it’s been there for a hundred years, moss is your best friend. Sheet moss or cushion moss laid around stone houses instantly gives that old-world, enchanted forest feel — as the fairies moved in long before you did.
You can find sheet moss at most garden centers or even collect it from shaded spots in your yard. Press it gently into moist soil around the cottage base, and it’ll settle in beautifully. Keep it slightly damp, and it stays lush and green all season long. This is honestly one of the easiest upgrades you can make to any fairy garden setup.
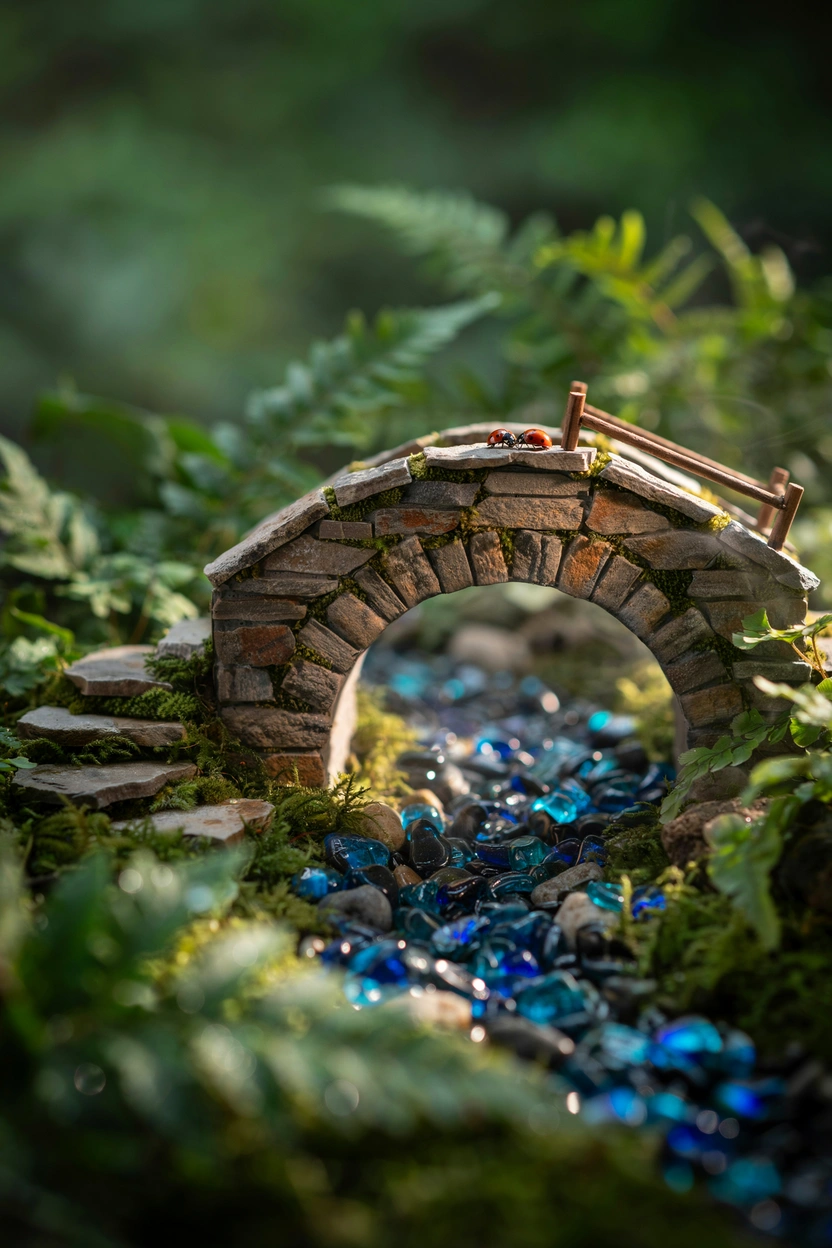
A Tiny Pebble Bridge Over a “Stream” Made of Blue Glass Stones
This is one of those features that makes people stop and say, How did you do that?” Create a miniature stream by pressing blue or clear glass pebbles into the soil in a gentle winding line. Then arch a small flat-stone bridge right over it.
You can build the bridge yourself using a few flat pieces of slate or“wai flagstone stacked and glued with waterproof adhesive. It takes maybe 20 minutes and costs almost nothing. The blue glass catches light most beautifully, especially in the morning. If you’re only adding one feature to your fairy garden this season, make it this one.
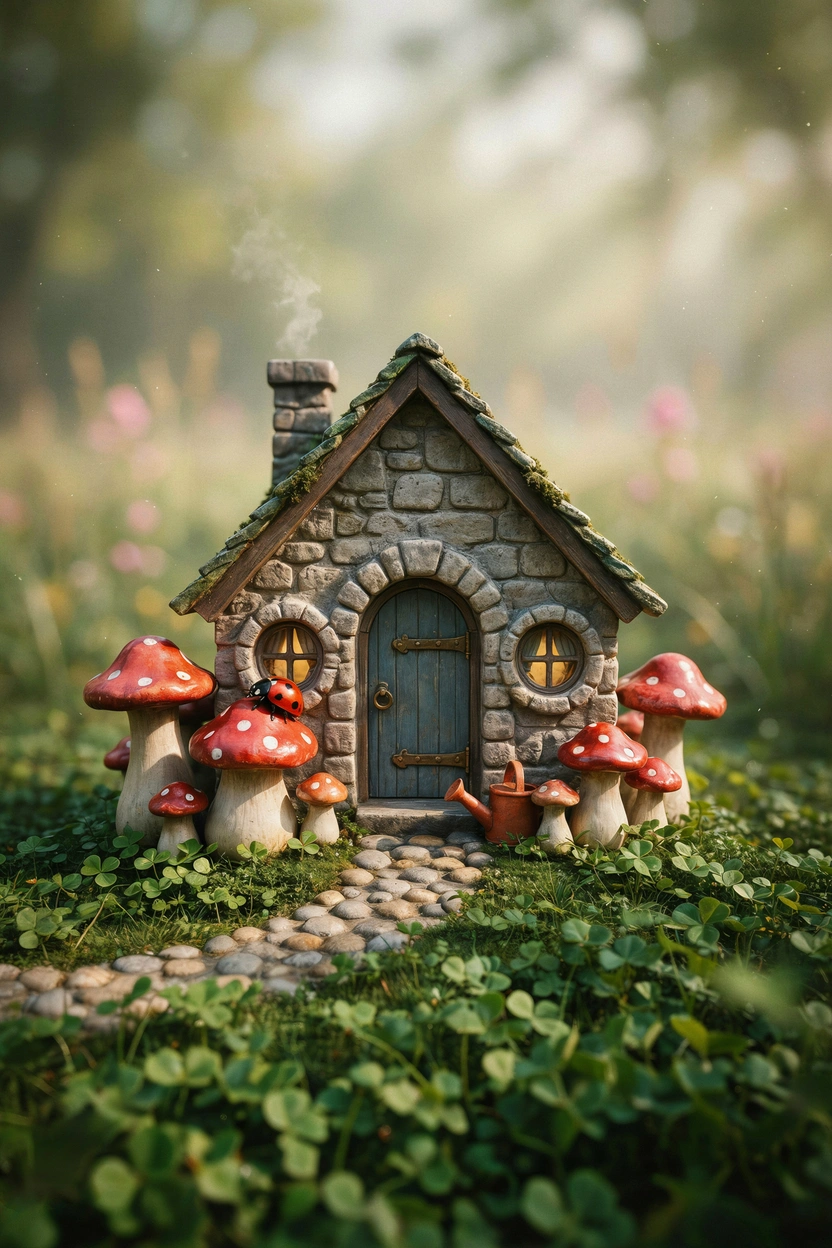
Toadstool Village Clustered Around a Stone Cottage
Pair your stone house with a little community of ceramic or hand-painted mushroom toadstools, and you’ve got yourself a full fairy village situation. Go for varying sizes — a tall one, a medium one, and a tiny one tucked behind it — and it looks completely natural.
Styling tip: Cluster them in odd numbers (3 or 5) and mix classic red-and-white caps with earthy brown tones. The contrast keeps it playful without looking childish. Tuck a tiny fairy figurine peeking out from behind the largest toadstool, and the whole thing comes to life.
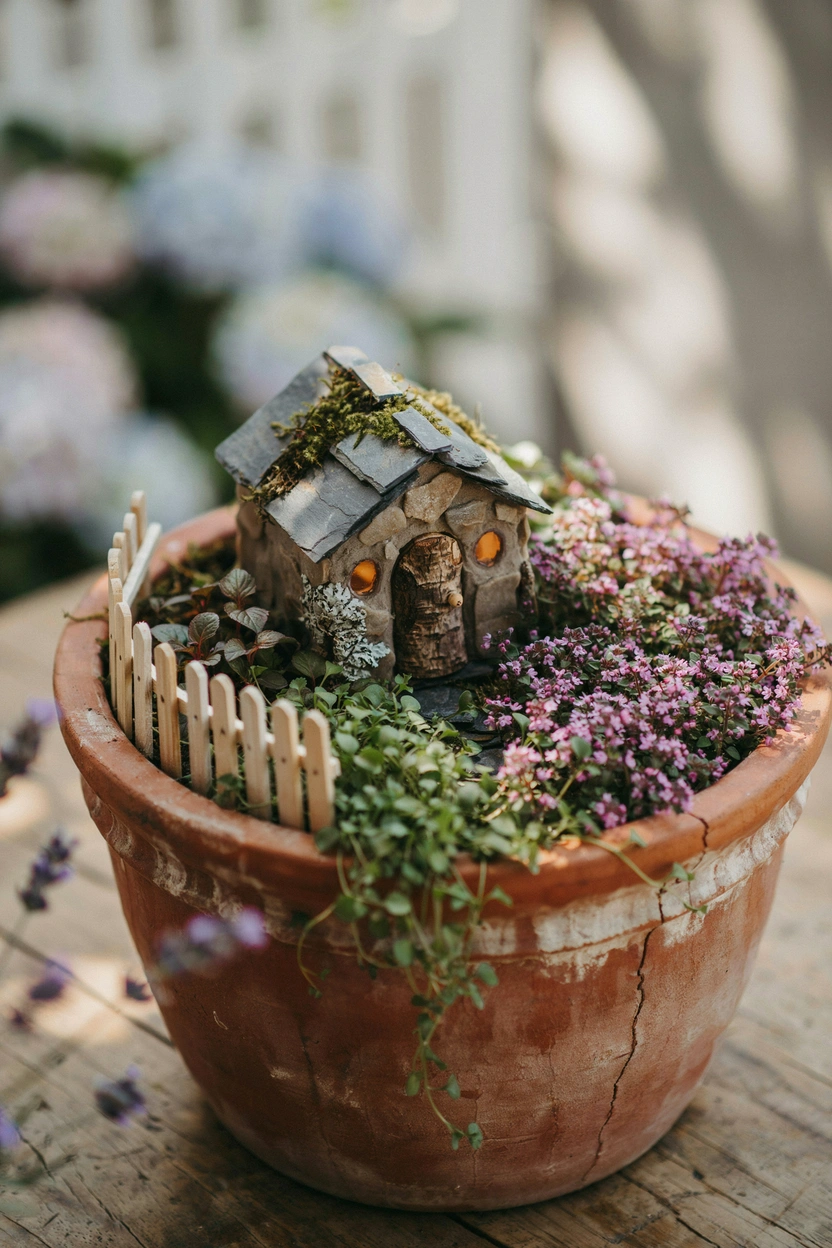
Flower-Framed Stone House in a Terracotta Pot
No yard? No problem. A large terracotta pot is all you need. Place your stone house slightly off-center inside the pot, fill in the gaps with potting mix, and plant tiny flowering ground covers around it — creeping thyme, baby tears, or Irish moss all work beautifully.
This setup is perfect for balconies, patios, or even a sunny kitchen windowsill. It’s also easy to move around, which means you can bring it indoors when it gets cold. Add a tiny picket fence made from toothpicks and twine around the inside edge, and it looks like a complete little world all on its own.
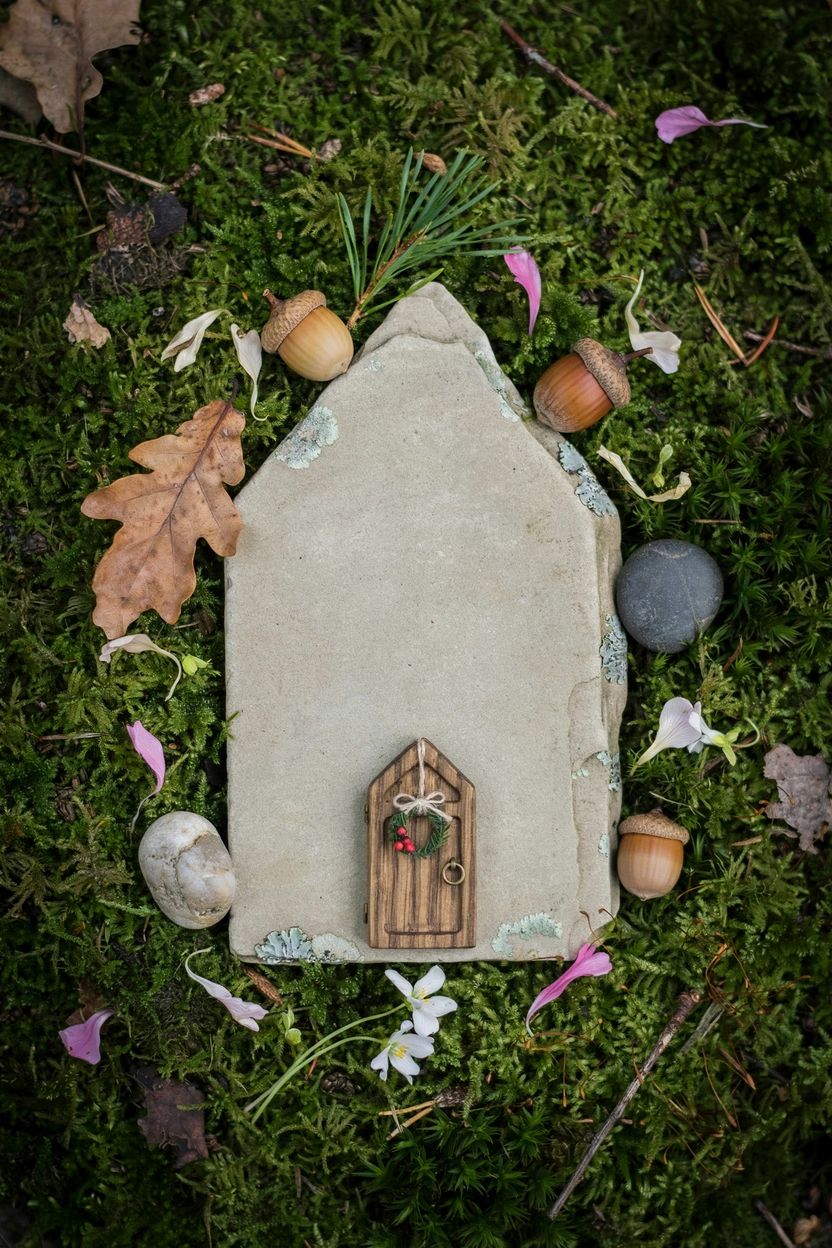
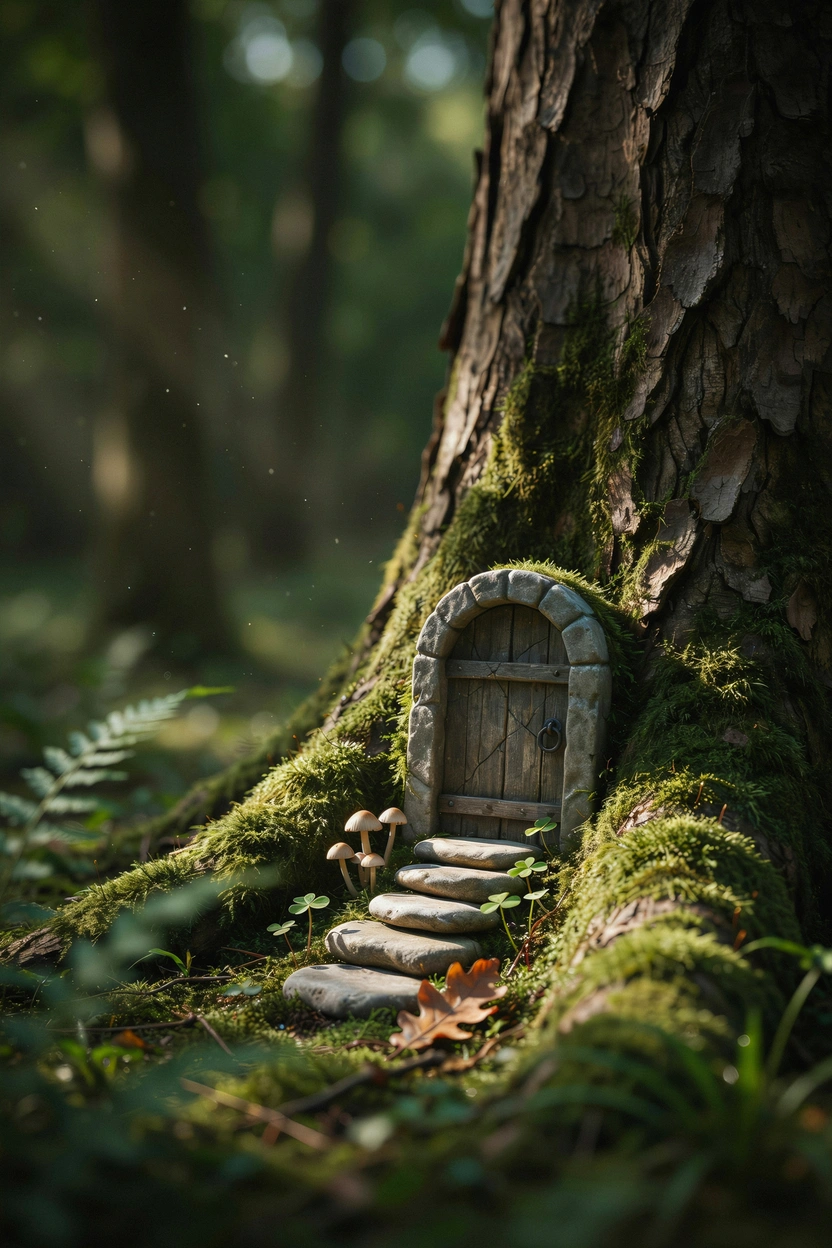
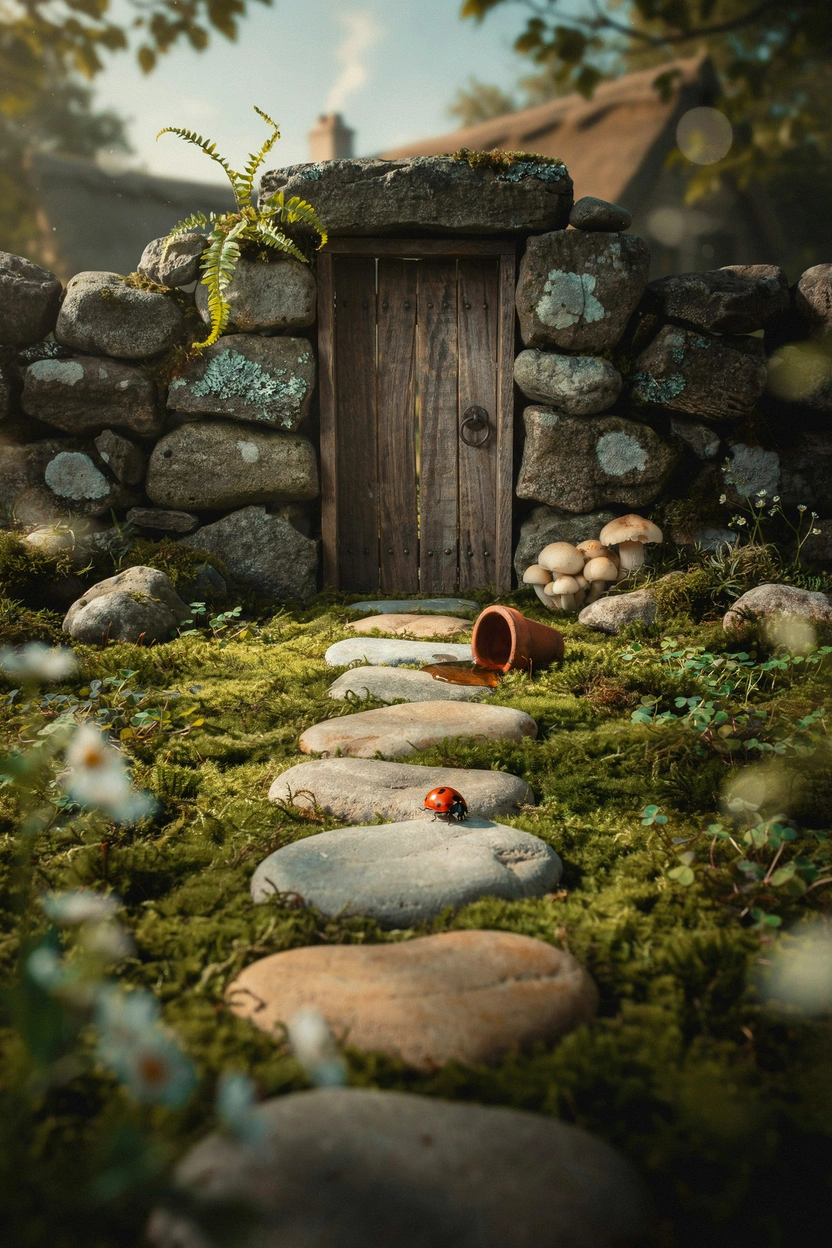
An Enchanted Forest Corner With a Hidden Stone Doorway
This one is pure magic. Find the base of a large tree in your garden — or even a big decorative pot with a faux tree stump — and nestle a small stone fairy door right into it. Add tiny pebble steps leading up to the door and moss creeping around the edges.
The idea is that the fairy world exists just beneath your garden, hidden in plain sight. Kids absolutely love this one. And honestly? Adults do too. You can find stone fairy doors at most garden decor shops, or make one using air-dry clay and a handful of pebbles. Seal it with waterproof varnish so it lasts through the rain.
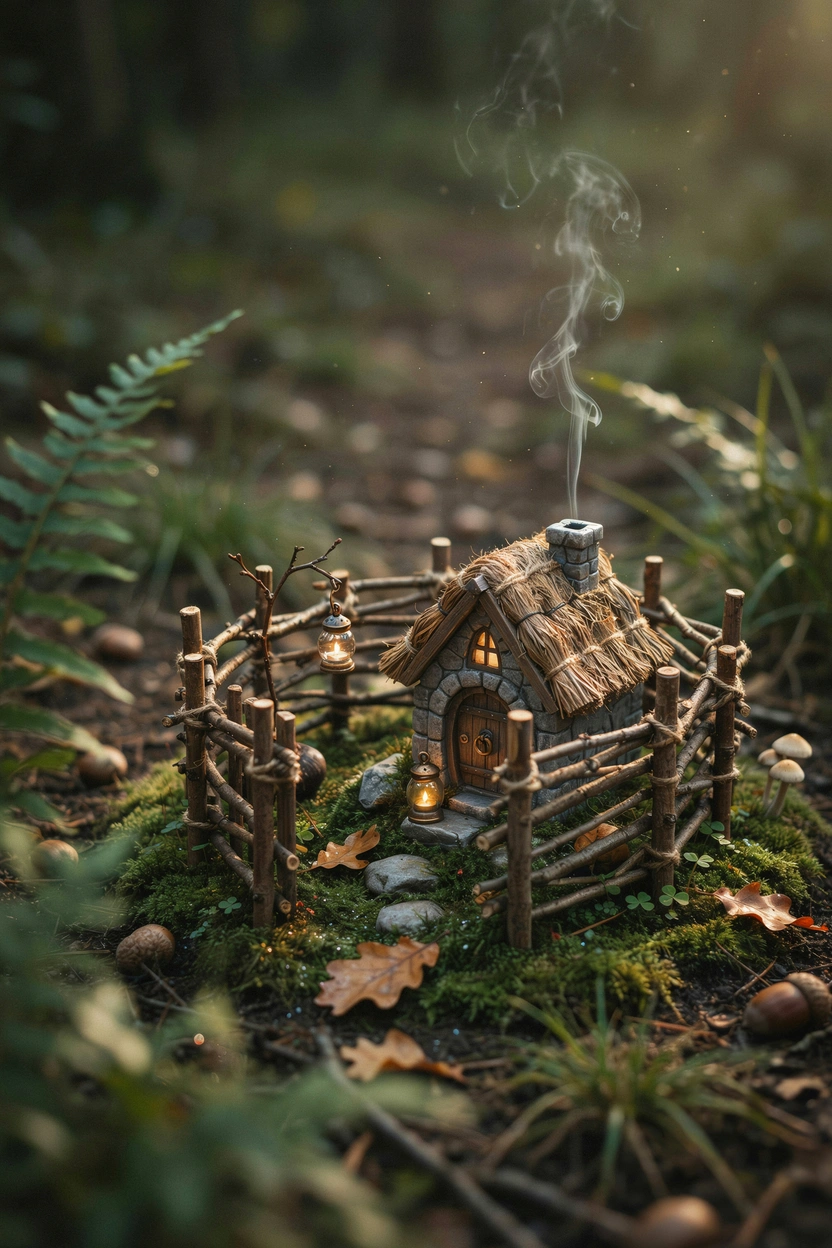
Twig-Fence Enclosure Around a Stone Fairy Cottage
Here’s a zero-cost idea that looks genuinely handcrafted and beautiful. Collect straight-ish twigs from your garden, cut them to the same height, and push them into the soil in a line around your stone cottage. Weave a thin piece of twine or jute cord through them horizontally, and you’ve got a rustic miniature fence.
It takes about 30 minutes and costs nothing if you already have twigs and twine at home. The natural wood tones against the stone house and green moss look incredibly organic. Add a couple of tiny solar lanterns inside the enclosure, and it becomes a whole mood — especially at night.
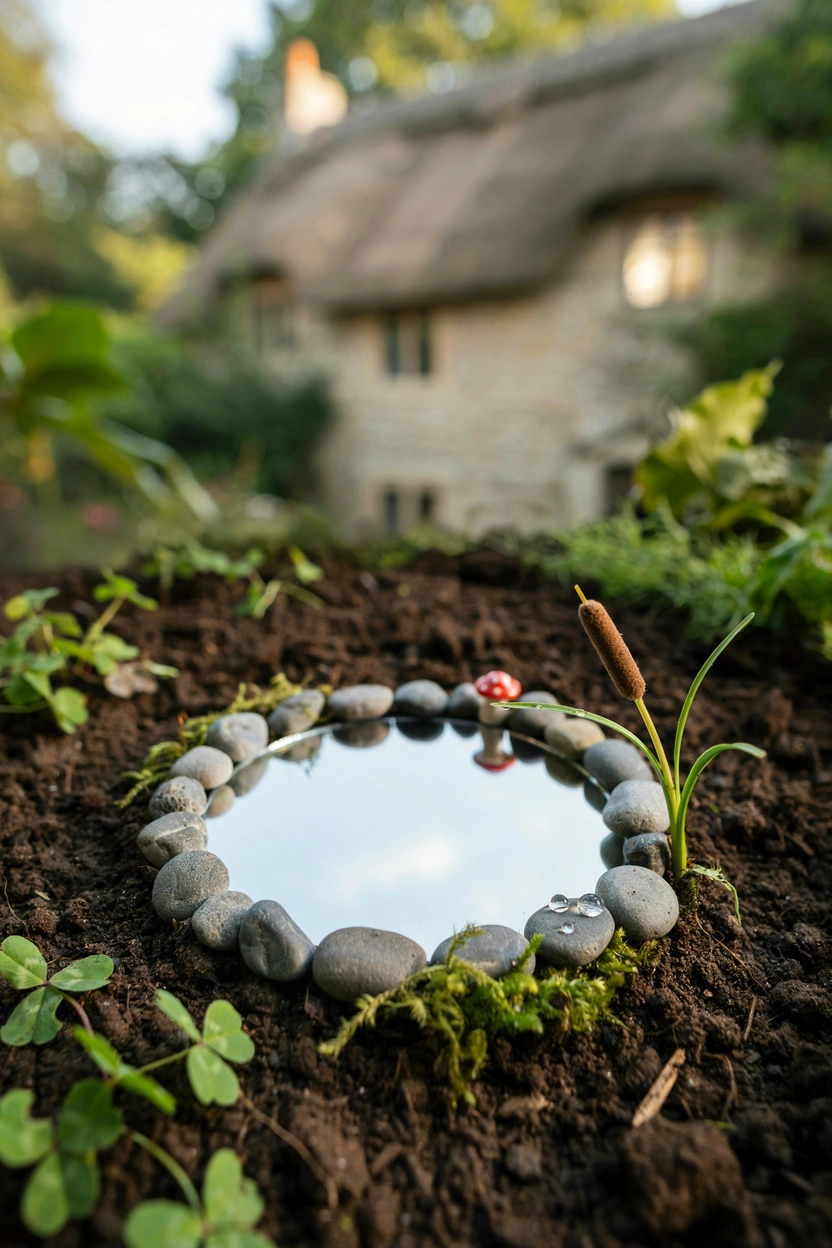
A Fairy Pond Made With a Bottle Cap and Pebble Surround
This is one of those ideas that looks way more impressive than the effort it takes. Use a small mirror or a flat bottle cap as your “pond” — press it into the soil so it sits flush with the surface. Then arrange tiny pebbles around the edge in a neat ring.
Add a miniature cattail plant or a tiny clump of blue fescue grass beside the pond, and it looks completely real at fairy scale. If you can find a tiny frog or duck figurine, even better. Place it right at the water’s edge for that extra storytelling detail that makes fairy gardens so irresistible.
A Moonlit Night Fairy Garden With White Stones and Silver Accents
This aesthetic is having a major moment on Pinterest right now — and honestly, it’s not hard to see why. Build your fairy garden using white or pale grey stones, white cushion moss, and a stone house with a light-washed or whitewashed finish. Keep everything in the same cool, pale palette.
Then add tiny silver fairy lights draped over the cottage and wound through the moss. Even in daylight, it looks ethereal. At night, it genuinely glows. This is the fairy garden for people who want something a little more sophisticated and less “children’s craft project” — it’s moody, dreamy, and completely gorgeous.
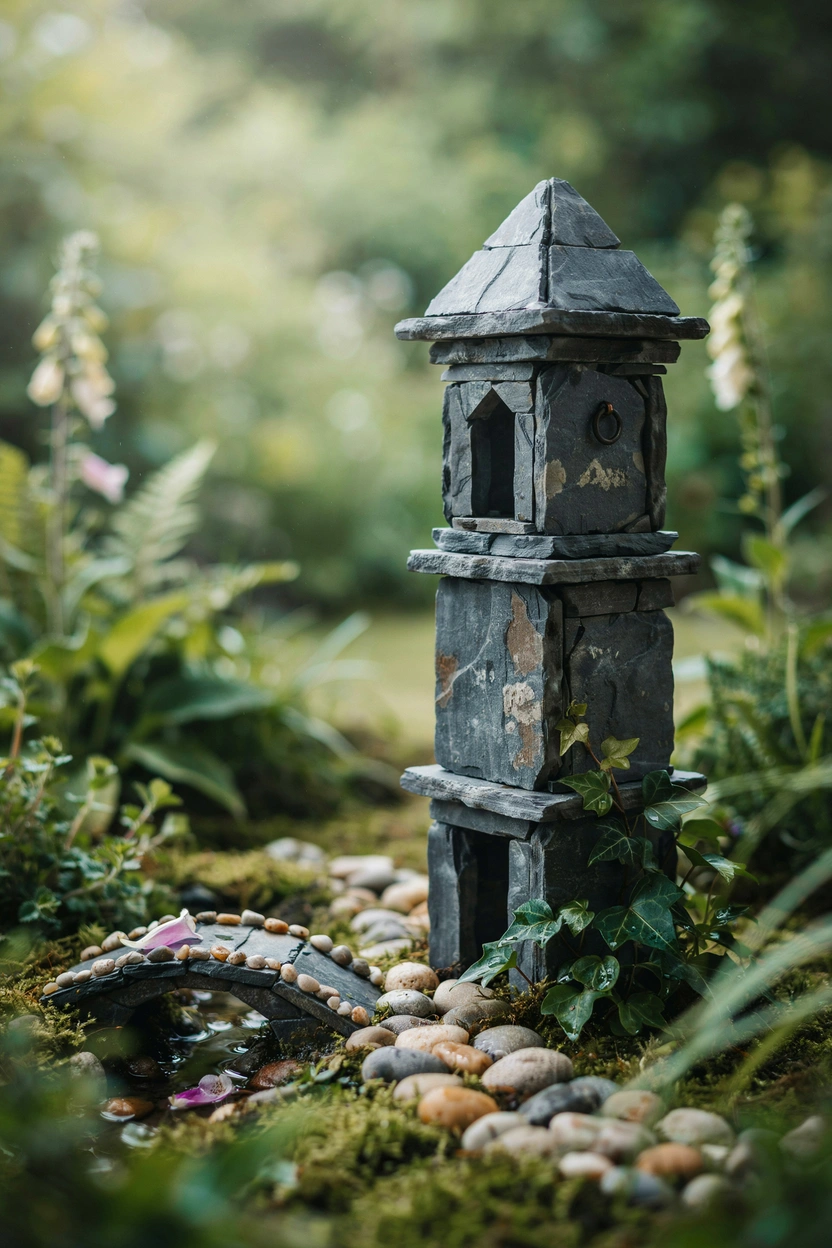
Stacked Slate Stone Tower as a Fairy Watchtower
Not every fairy garden needs a cottage. Try this: stack flat pieces of slate into a narrow tower shape — wide at the bottom, tapering slightly as you go up. It becomes a fairy watchtower or lighthouse and adds wonderful vertical interest to what might otherwise be a flat layout.
Secure the layers with a little waterproof outdoor adhesive and let it cure before placing it in your garden. Tuck tiny vines of creeping fig or miniature ivy at the base so it looks like the tower has been standing there for centuries. Pair it with a pebble path and a mini bridge nearby, and the whole scene tells a story.
Creeping Thyme as the Ultimate Fairy Garden Ground Cover
If you’re building an outdoor fairy garden and want a ground cover that actually thrives, creeping thyme is it. It stays tiny, blooms in pretty pink-purple clusters, releases a gentle fragrance when you brush past it, and it’s practically indestructible. It even tolerates light foot traffic.
Plant it densely around your stone cottage so it fills every gap between the pebbles and spills softly over the edges. When it blooms in late spring, the whole fairy garden transforms into something that looks like a painting.
Styling tip: Mix creeping thyme with baby’s tears for two different textures — the fine, lacy thyme against the rounded, pillowy baby’s tears looks incredible together.
A Stepping Stone Path Leading to the Fairy House Front Door
There’s something so satisfying about a tiny path leading somewhere. Use flat pebbles or thin slices of cork (from a wine cork, cut lengthwise) to create a miniature stepping stone path that winds up to the front door of your stone cottage.
Press each piece slightly into the soil so it sits level and won’t shift around. Space them like real stepping stones — close enough to look intentional, with just enough gap for moss or thyme to creep between them. It’s a small detail, but it’s the kind of thing that makes people look closer. And on Pinterest, it’s the kind of photo that gets saved obsessively.
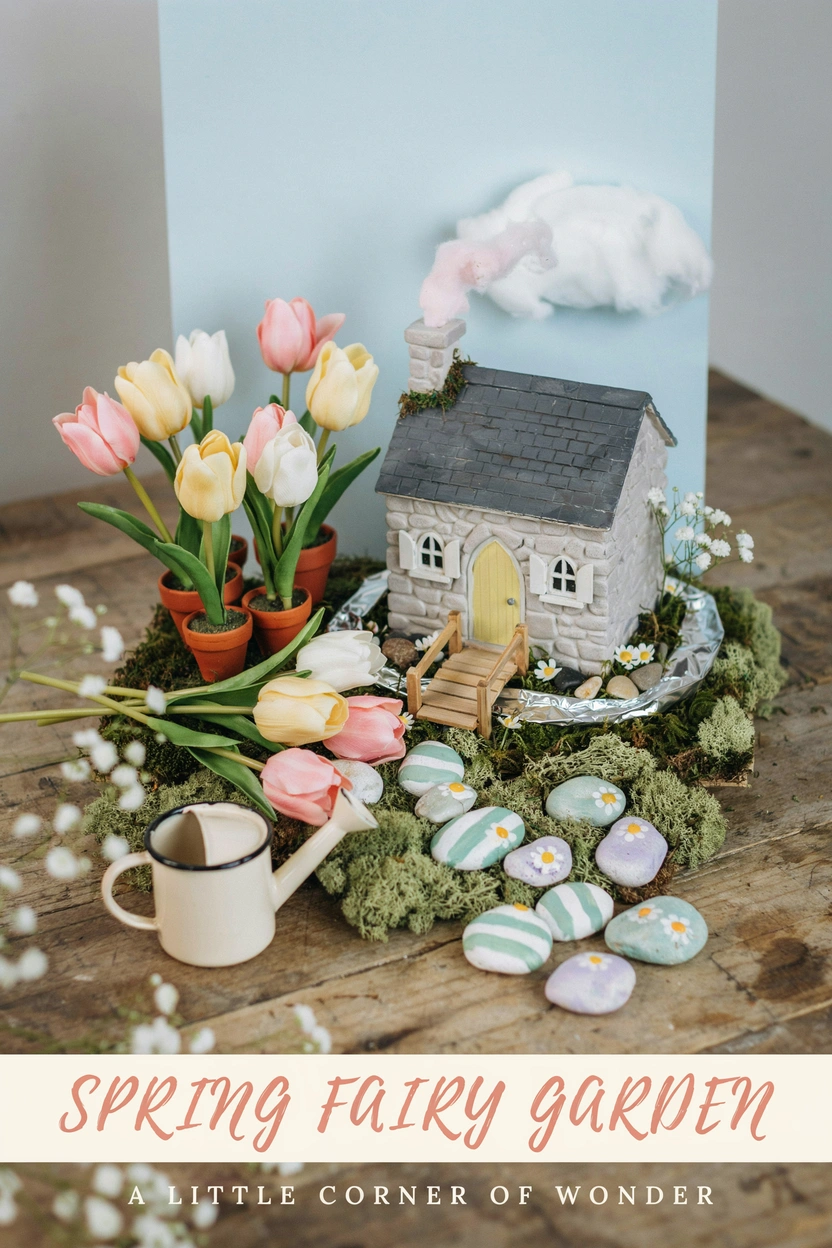
Seasonal Fairy Garden: Spring Edition With Stone House & Tulip Surround
One of the best things about fairy gardens is that you can update them seasonally without rebuilding from scratch. For spring, pull out any winter decor and bring in miniature tulip picks in soft pinks and yellows, scatter pastel-painted pebbles around the base of the cottage, and swap in fresh light-green moss.
It takes about 15 minutes and makes your fairy garden look completely fresh and seasonal. You can find miniature flower picks at most craft stores. If you have kids, this is a great activity to do together — let them arrange the flowers and “decorate” for spring. The photos are always adorable.
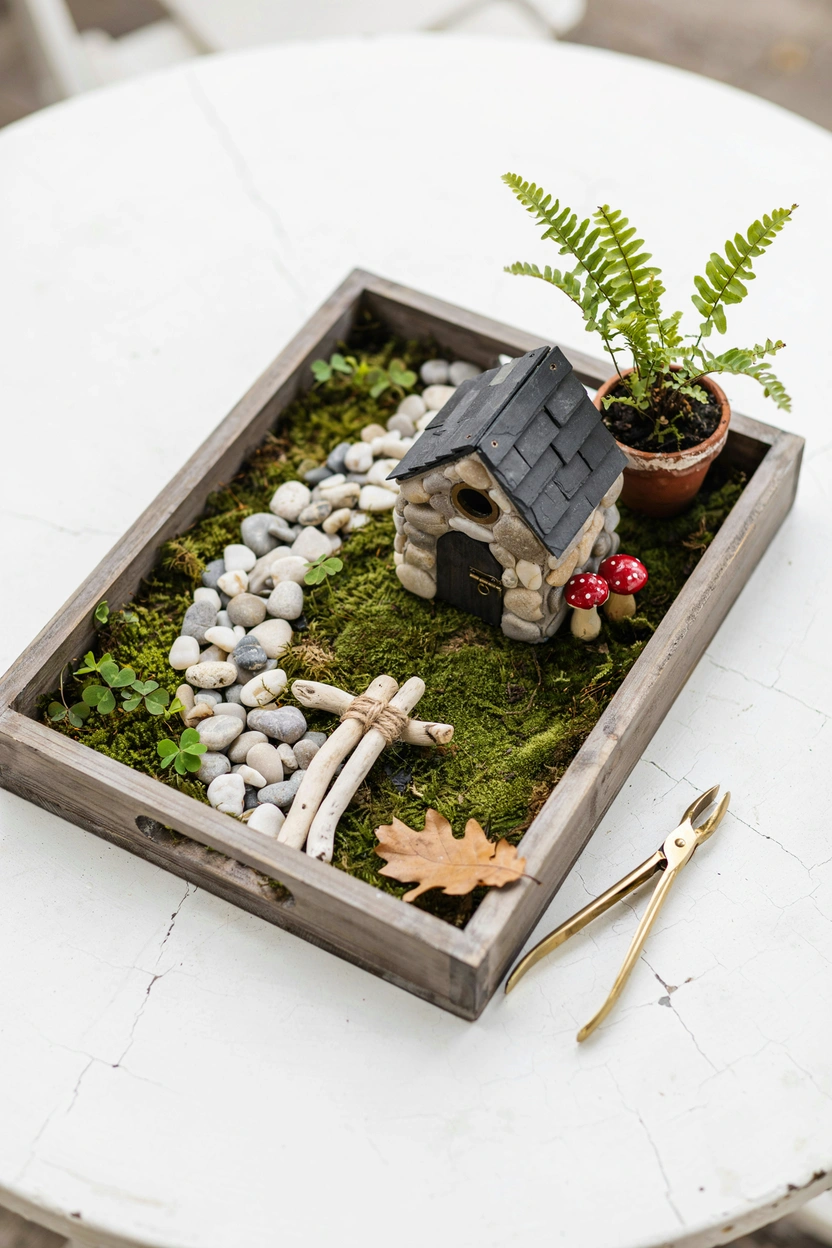
A Raised Wooden Tray Fairy Garden With Stone House Centerpiece
If you want a fairy garden that doubles as a table centerpiece — for a porch table, outdoor dining table, or even a coffee table on a covered patio — build it inside a shallow wooden tray or crate. Place the stone house slightly off-center as your focal point, fill in with moss and stones, and add the bridge somewhere in the middle distance.
The wooden tray frame gives the whole thing a polished, intentional look — like a piece of decor rather than just a garden project. It’s also easy to move inside if the weather turns. This works beautifully for spring and summer entertaining, and it photographs absolutely beautifully from above.
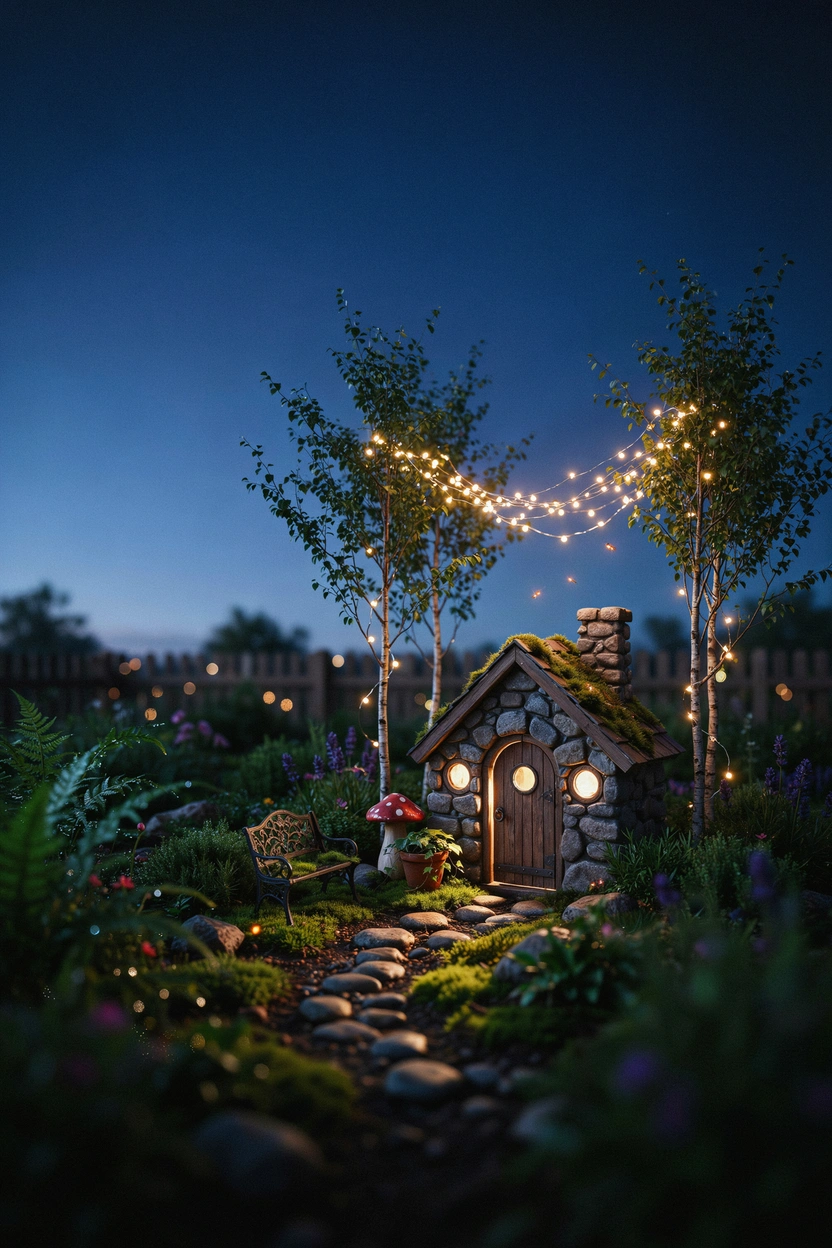
Solar Fairy Light Wreath Around the Stone House for Nighttime Magic
Okay, this last one is the one that gets the most saves on Pinterest — and once you see it at night, you’ll understand completely. Take a strand of tiny solar-powered fairy lights and wrap them loosely around and above your stone cottage. Let some drape over the moss, some wind around the twig fence, some rest near the pebble path.
During the day, the lights are barely visible. But when the sun goes down, and they flicker on automatically? The entire garden glows. It looks like something out of a movie.
Styling tip: Always go for warm white lights, not cool white. Warm tones photograph more beautifully and feel far more magical in person, too.
Conclusion
You don’t need a huge backyard or an expensive shopping haul to make something truly beautiful. Honestly, some of the most magical fairy gardens out there were built with a handful of pebbles, a little moss, and a stone cottage that cost less than a coffee.
Pick just one idea from this list — maybe it’s the moonlit white stone setup, or a simple twig fence around a tiny cottage, or that pebble bridge over a blue glass stream. Start there. Build it. See how it feels. Most people find that once they place that first stone, they can’t stop.
Fairy gardens have this way of growing on their own — not just in the garden, but in you. You start noticing interesting pebbles on walks. You save a wine cork to slice into stepping stones. You spot the perfect toadstool at a craft store and just know where it belongs.
That’s the real magic. And it starts with you.