You’ve picked out the cabinets. You’ve fussed over the countertop samples for weeks. But something’s still missing, and you can’t quite put your finger on it. That blank wall behind your stove or sink just isn’t pulling its weight.
Here’s the thing most people don’t realize until they see it in person: a backsplash isn’t just a practical surface to wipe down grease splatters. It’s the one vertical spot in your kitchen where you can actually play with movement, texture, and personality. And nothing does that quite like a herringbone backsplash.
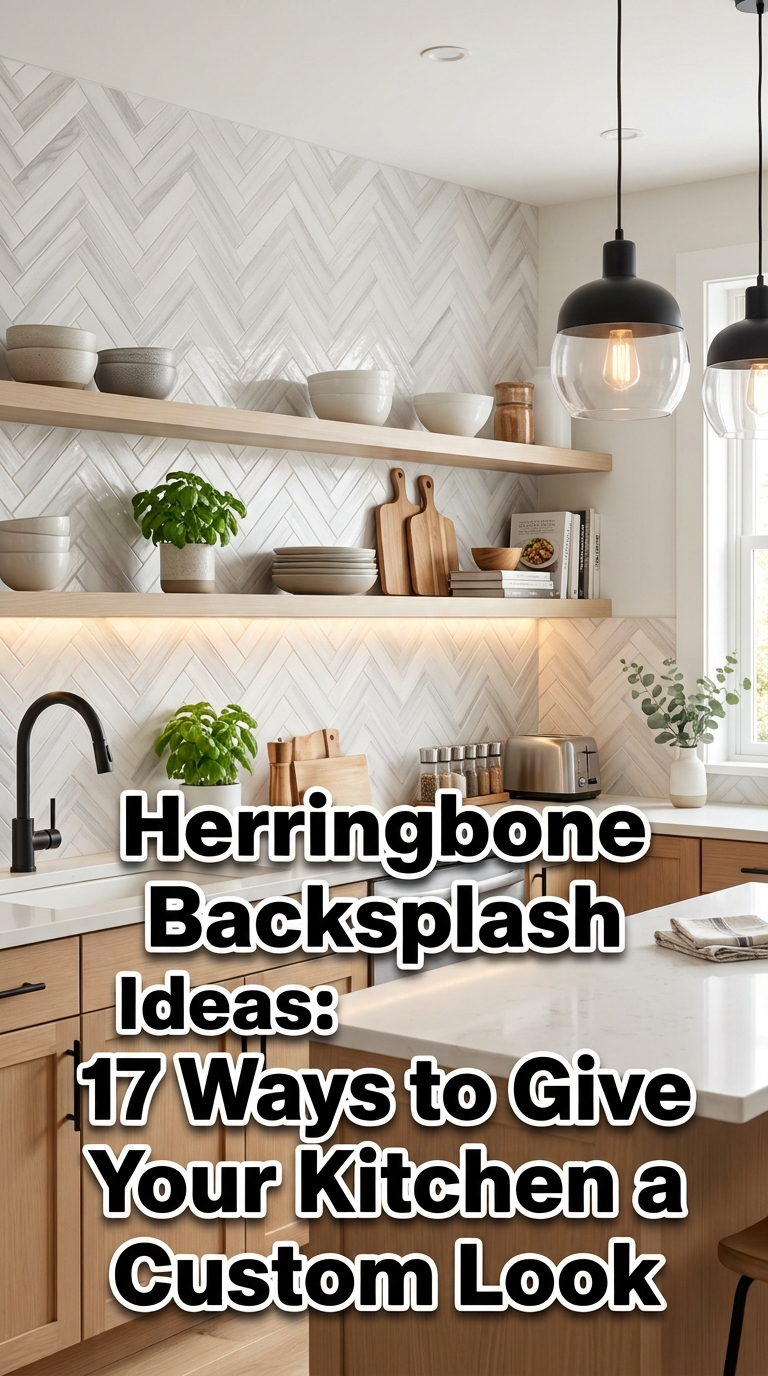
Unlike a flat subway tile laid in straight rows, herringbone tiles zigzag across the wall in a V-shaped pattern that catches the eye and adds a sense of custom craftsmanship.
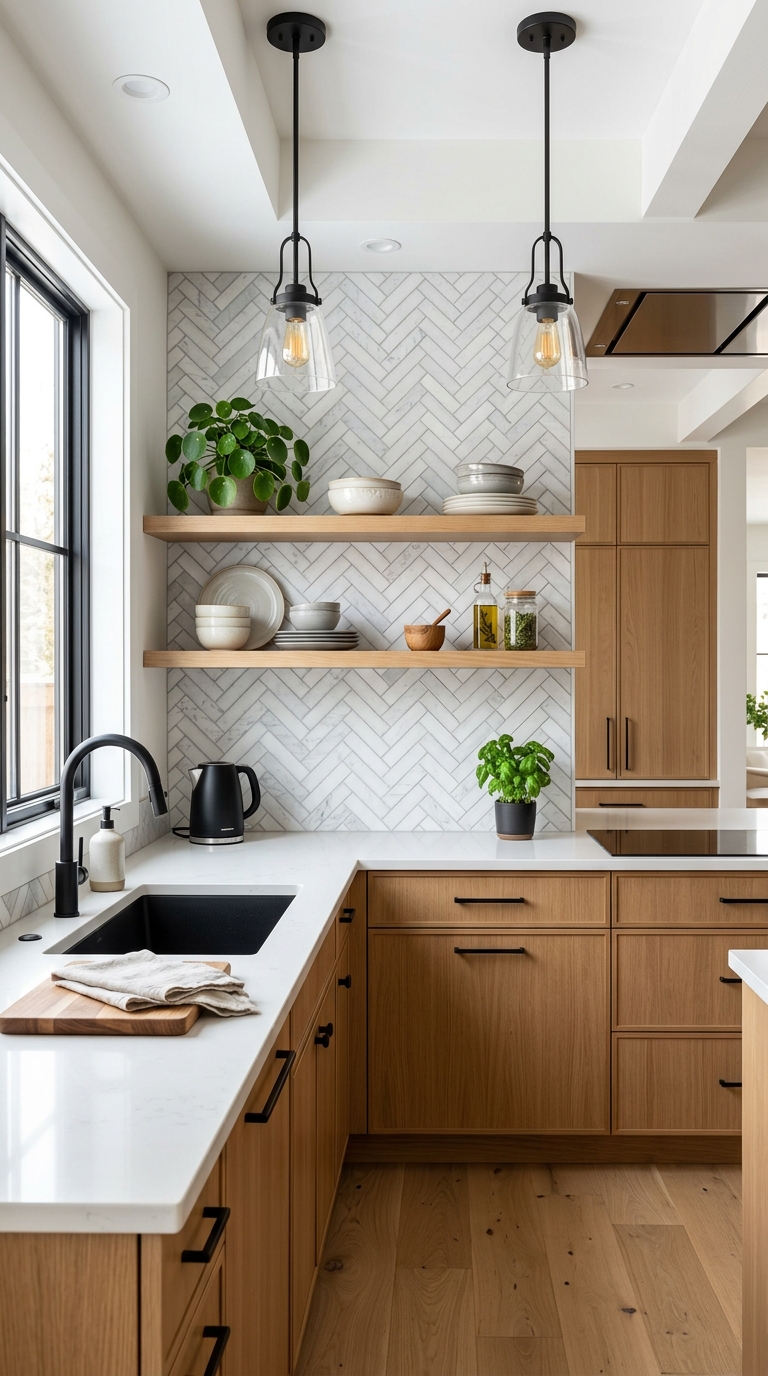
It’s the kind of detail that makes people ask, “Wait, did you design this yourself?” And the best part is that it works with almost any budget, any tile material, and any kitchen style, from a cozy farmhouse to a sleek modern space.
In this guide, you’ll find 17 herringbone backsplash ideas covering different materials, colors, and layouts, plus real cost expectations and honest answers about maintenance and installation. By the end, you’ll know exactly which version fits your kitchen.
Classic White Herringbone with Contrasting Grout
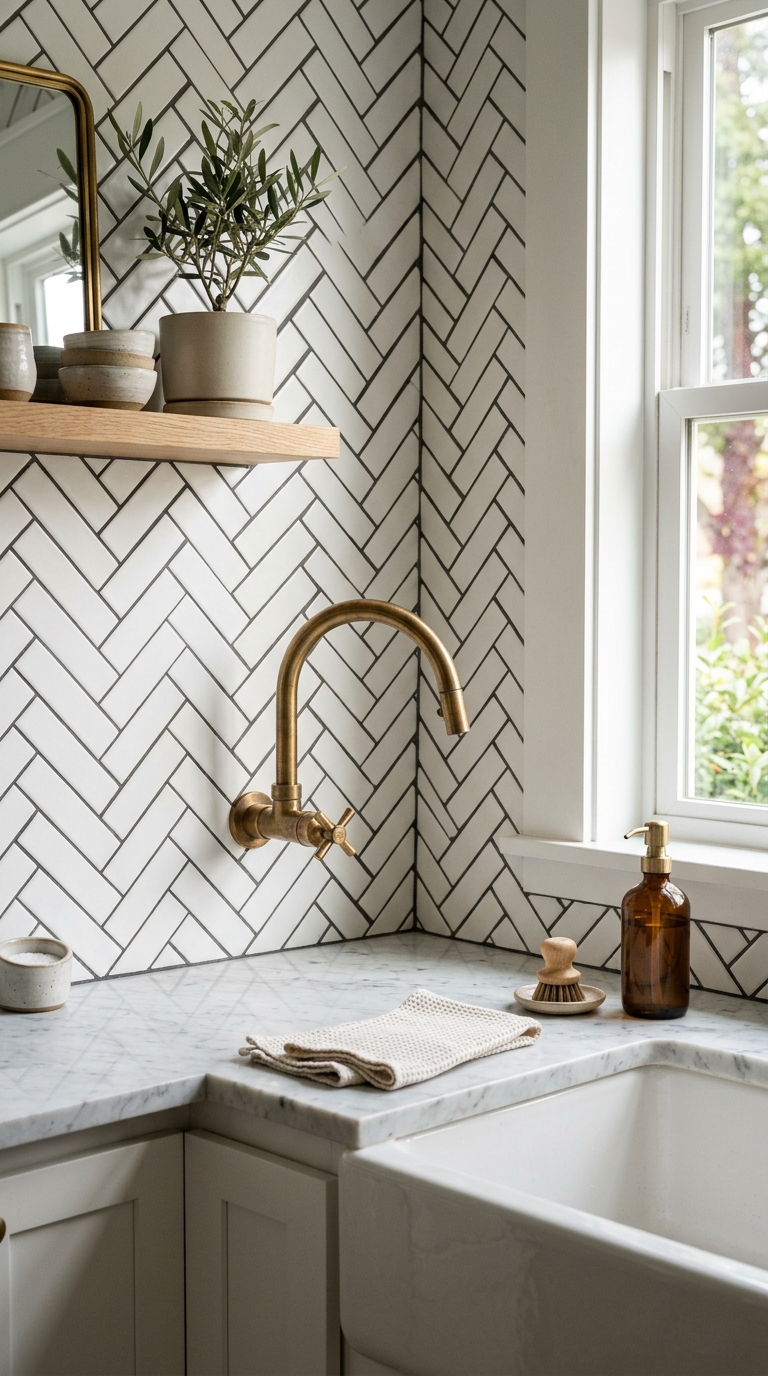
If you want something that feels safe but still looks intentional, this is where you start. A crisp white herringbone tile with a soft gray or charcoal grout line lets the pattern do all the talking. The contrast makes every angle of the zigzag pop, so even a simple ceramic tile ends up looking custom-designed.
This combo works because it doesn’t compete with anything else in your kitchen. Your cabinets, hardware, and countertop can stay exactly as they are, and the backsplash quietly upgrades the whole room. It’s also one of the easiest looks to keep looking fresh year after year since white never really goes out of style.
Herringbone tile is a favorite for renters and small-space kitchens alike — for more ways to make a rented or compact kitchen feel custom, browse these apartment kitchen decor ideas.
Styling Tip: Style the counter below with a single ceramic vase and one cutting board leaned against the backsplash for that “lived-in but polished” look.
Why You’ll Love It:
- Timeless, never feels dated
- Pairs with literally any cabinet color
- Budget-friendly compared to stone or glass
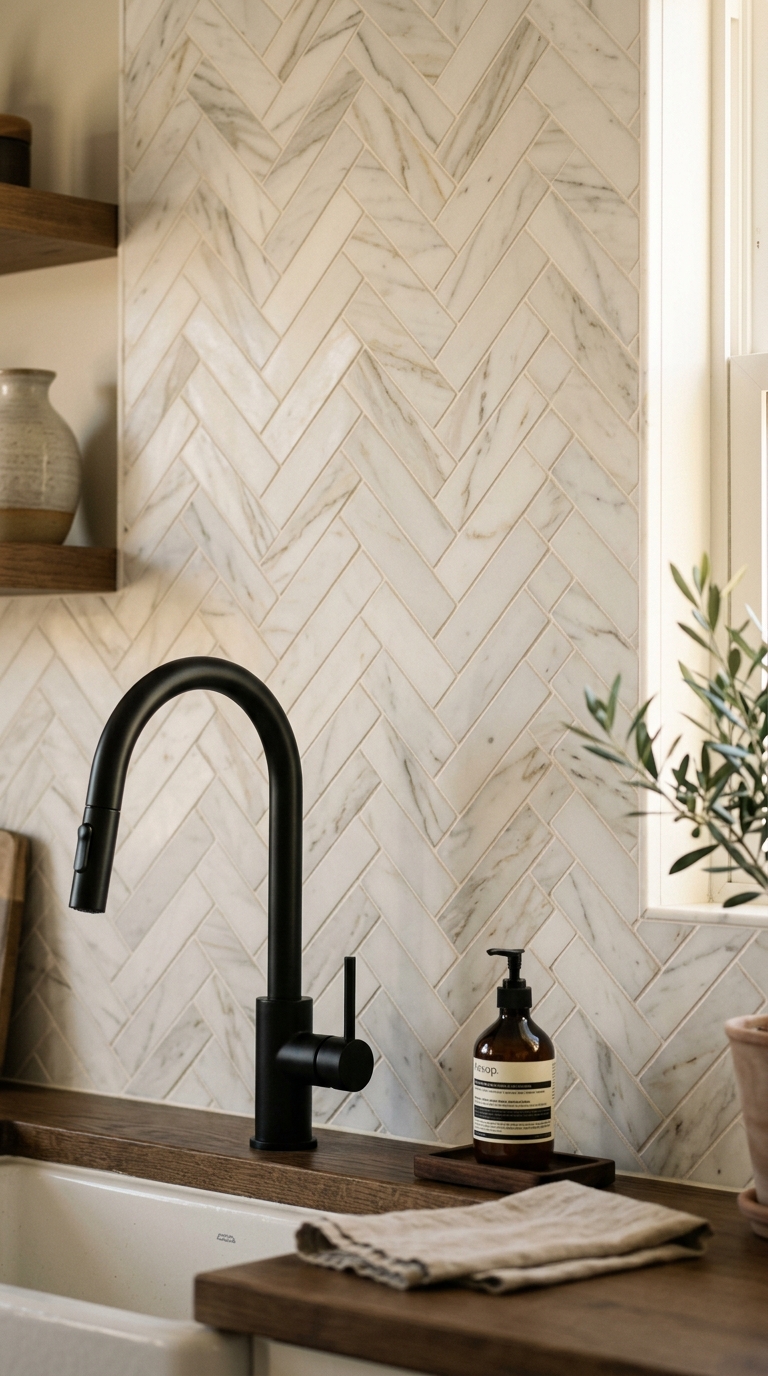
Marble Herringbone for Timeless Elegance
Marble costs more, there’s no getting around that, but here’s why designers keep coming back to it. Real Carrara or Calacatta marble in a herringbone layout has natural veining that moves differently across every single tile, so no two walls ever look identical. That kind of one-of-a-kind quality is hard to fake.
Marble also reflects light in a way that ceramic and porcelain simply can’t match. In a kitchen with big windows, this creates a soft glow that changes throughout the day. Pair it with either white or dark cabinetry, and it holds its own as the star of the room.
Styling Tip: Photograph this backsplash during golden hour to capture how the veining catches light differently from midday shots.
Why You’ll Love It:
- Genuinely unique veining pattern in every install
- Adds real resale value to your home
- Pairs beautifully with both light and dark cabinets
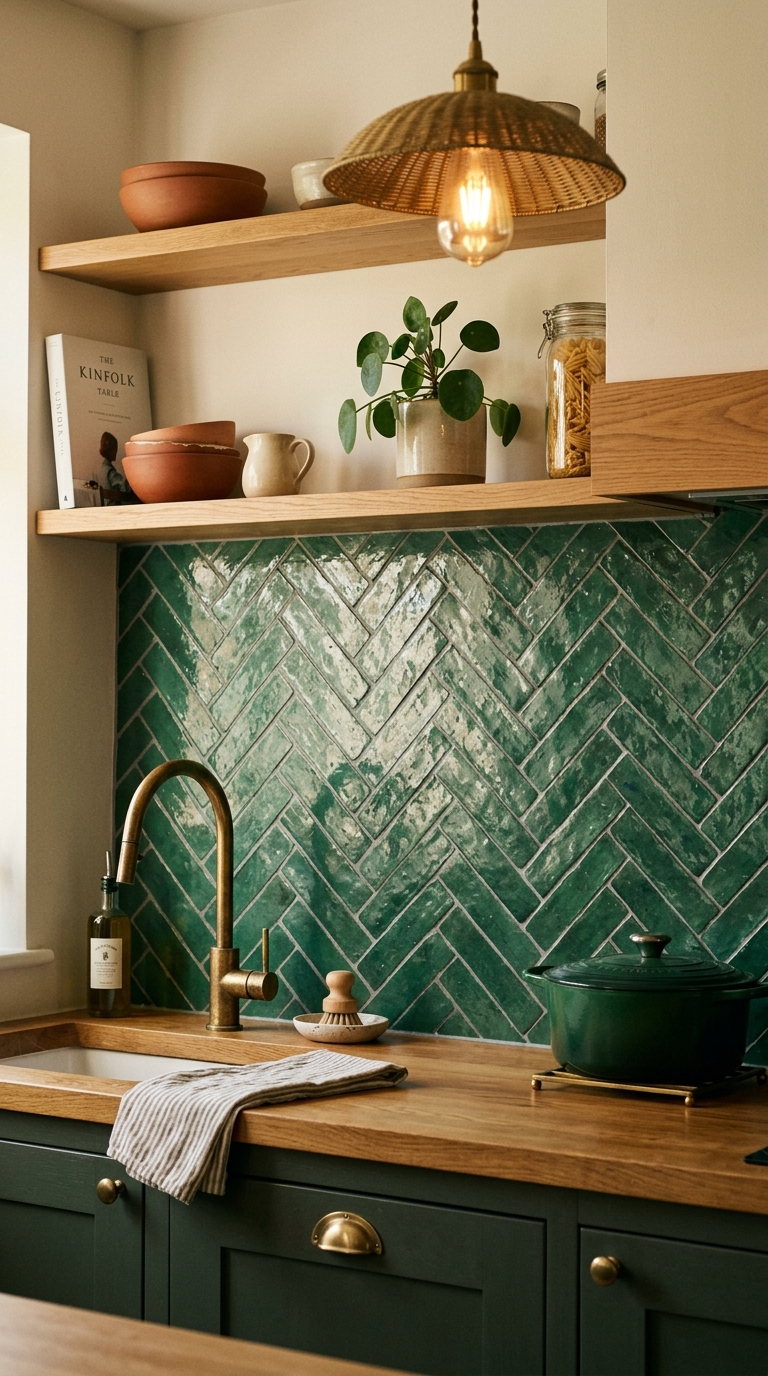
Zellige Herringbone for Handmade, Artisanal Texture
Here’s something a lot of people miss: no two zellige tiles look the same, and that’s actually the entire point. These hand-glazed tiles come from a centuries-old Moroccan tradition, and every piece has slight color shifts, tiny imperfections, and a subtle shimmer that mass-produced tile just can’t replicate.
Once your backsplash is in, bring some life into the space with greenery — these kitchen plant decor ideas are a simple way to soften all that geometric tile.
Set in a herringbone pattern, zellige tiles create movement that feels artisanal rather than manufactured. Colors like emerald green, deep navy, or warm terracotta bring in personality without needing a single extra accessory. It’s a great choice if your kitchen already leans toward an eclectic or globally-inspired look.
Styling Tip: Keep the surrounding decor minimal so the tile’s texture and color variation stay the visual focus.
Why You’ll Love It:
- Genuinely handmade, one-of-a-kind texture
- Adds bold color without overwhelming the space
- Great conversation starter for guests
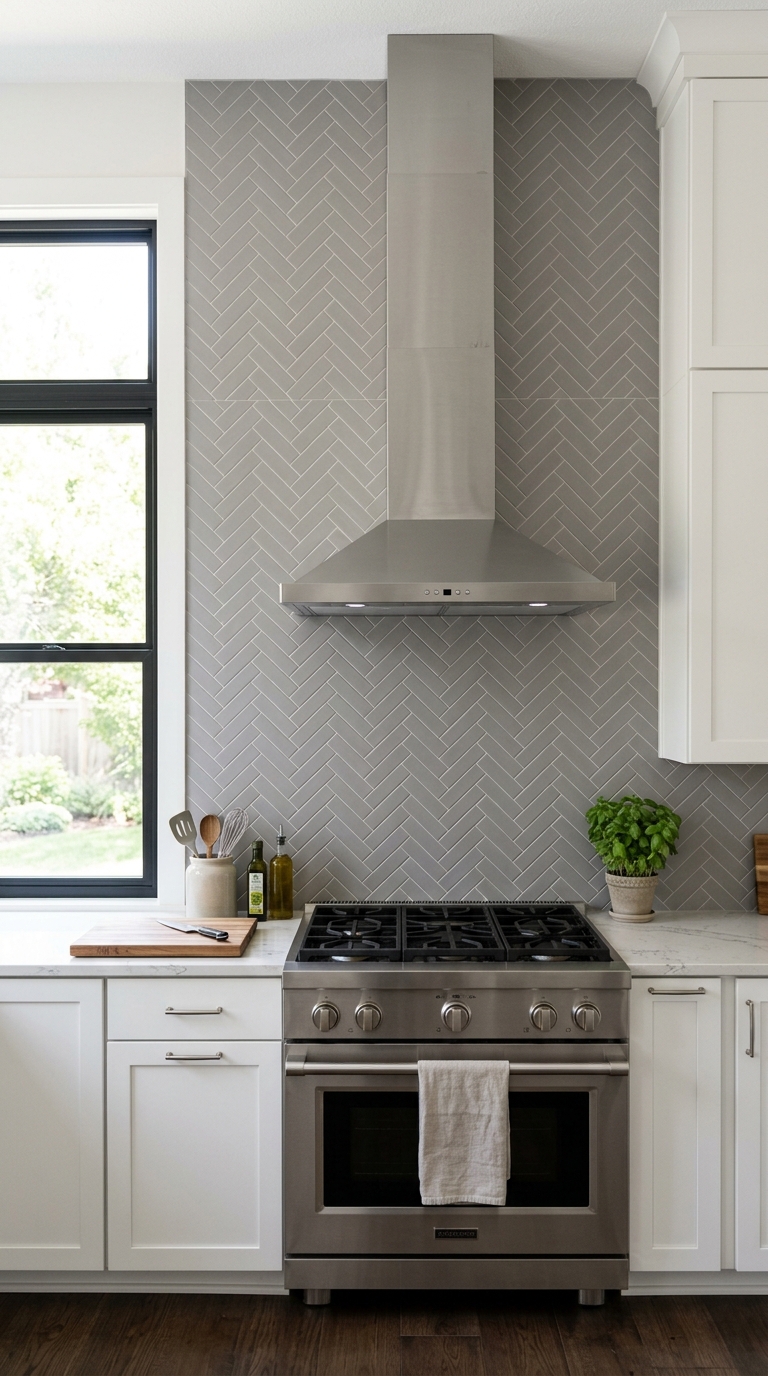
Vertical Herringbone to Add Height and Drama
Most people automatically picture herringbone running horizontally, but flipping the direction changes the entire feel of a kitchen. A vertical herringbone layout pulls the eye upward, which makes low ceilings feel taller and gives even a plain kitchen a sense of drama.
This layout works especially well behind a stove as a focal point, drawing attention to that one wall instead of spreading the eye across the whole room. It’s a small change in direction that makes a big difference in how custom the space feels.
Styling Tip: Shoot this angle from a low camera position to exaggerate the upward movement of the tile.
Why You’ll Love It:
- Makes low ceilings feel taller
- Creates a strong focal point behind the range
- Feels fresh compared to standard horizontal layouts
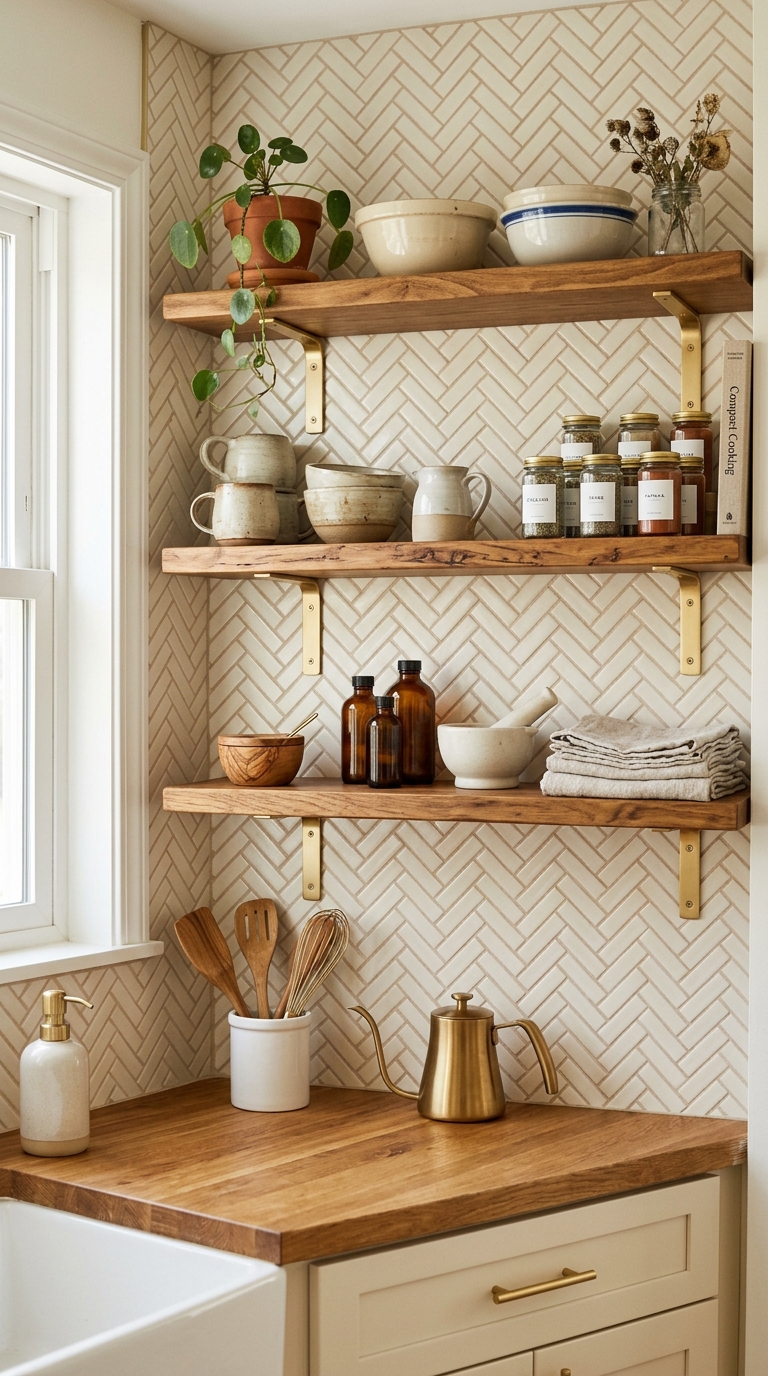
Mini Herringbone Tiles for Small Kitchens
If your kitchen feels a little boxed in, this one’s for you. Smaller tiles, think 1×2 or 1×3 inches, create a tighter, more intricate herringbone pattern with more grout lines packed into the same space. That added detail tricks the eye into perceiving more depth, which makes a compact kitchen feel less flat and boxy.
Mini herringbone also works beautifully in tight spots like a narrow galley kitchen or a small apartment kitchen where every design choice needs to earn its place. The scale of the tile matches the scale of the room instead of overwhelming it.
If your kitchen is on the smaller side, a herringbone pattern can visually expand the space — pair it with these small kitchen storage ideas to keep the look clean and clutter-free.
Styling Tip: Use under-cabinet lighting to highlight the extra grout detail and make the pattern read even more intricately in photos.
Why You’ll Love It:
- Makes small kitchens feel larger and more dynamic
- Adds texture without needing bold color
- Works in tight galley and apartment layouts
Best For: Small kitchens, apartments, galley layouts
Large-Format Herringbone for a Bold Modern Look
Less grout, less cleaning, more visual impact, that’s the tradeoff with large-format herringbone tile. Using bigger tiles, like 3×12 inches, creates a bolder, more contemporary zigzag with fewer lines breaking up the surface. It reads as sleek rather than busy.
This option also means you’ll need fewer tiles overall to cover your backsplash, which can help offset the higher per-tile cost. It’s a strong fit for minimalist or European-style kitchens where clean lines matter more than intricate detail.
Styling Tip: Photograph this style with minimal counter clutter so the bold tile lines stay the clear focal point.
Why You’ll Love It:
- Fewer grout lines mean easier long-term cleaning
- Bold, modern statement without feeling busy
- Requires less tile than smaller formats
Best For: Modern kitchens, minimalist homes, open-concept spaces
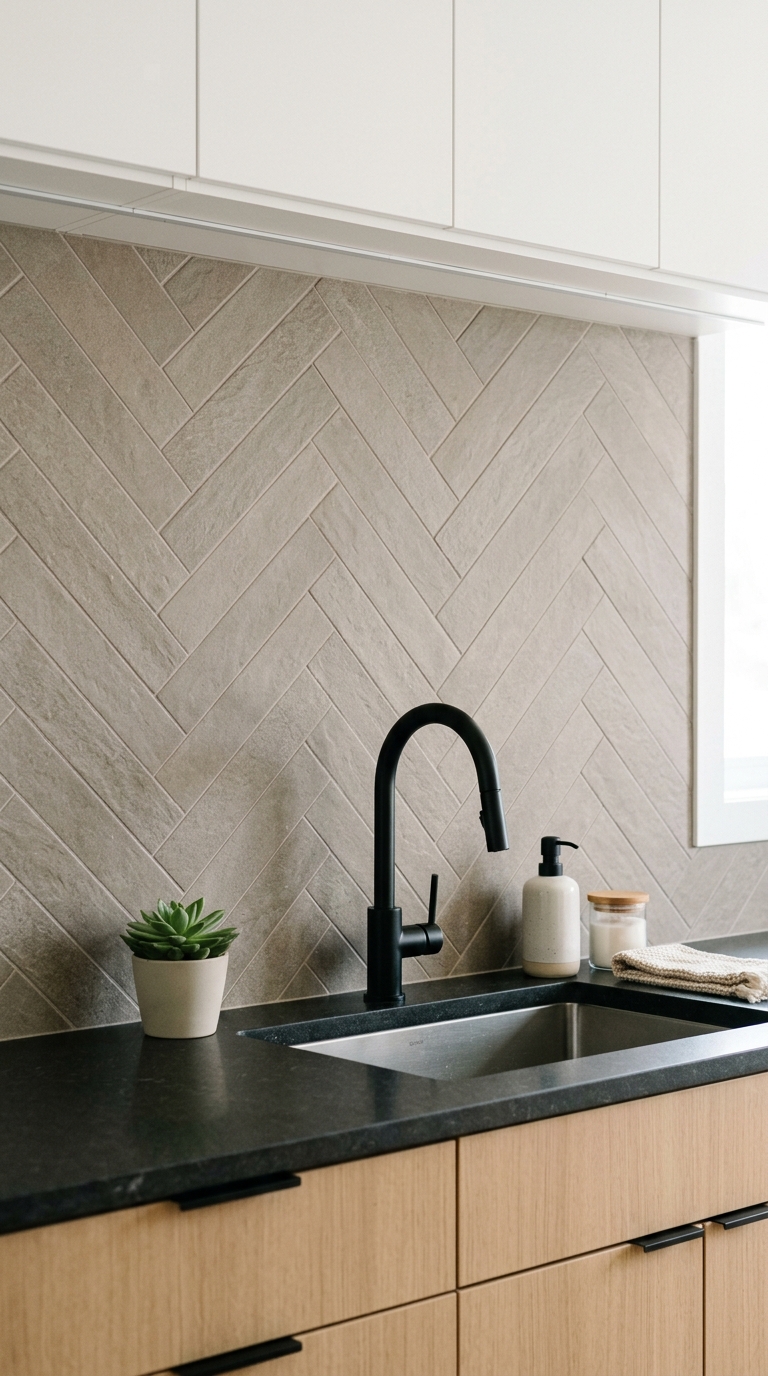
Colorful Herringbone as a Focal Point
If you’ve been hesitant to bring color into your kitchen, a colorful herringbone backsplash is the lowest-risk way to try it. Since it’s contained to one wall, you get all the personality and none of the commitment of painting cabinets or walls a bold shade.
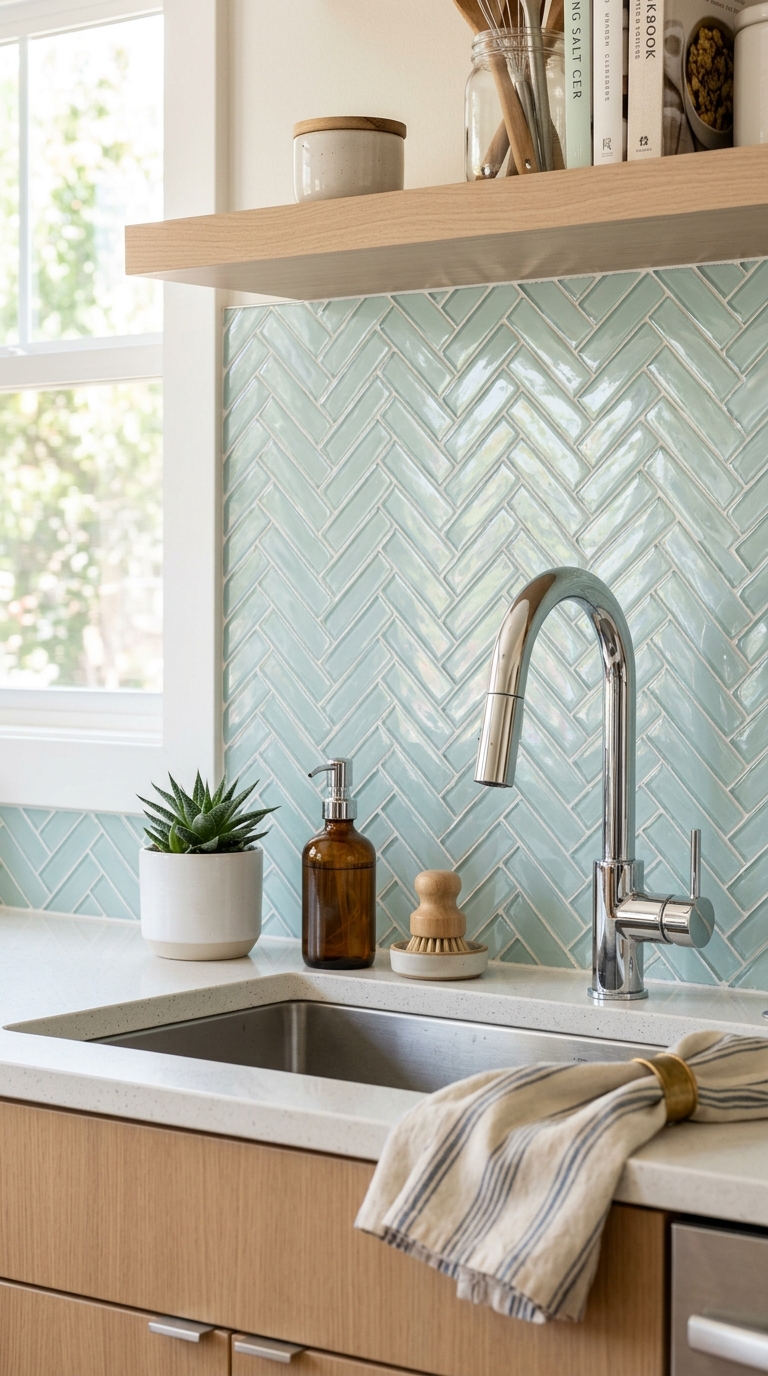
Blues bring a coastal, calming feel. Greens connect the space to nature. And bold black herringbone creates dramatic contrast, especially set against white cabinetry. Whatever shade you pick, it instantly becomes the visual anchor of the room.
Styling Tip: Choose one accent object, a bowl, a plant, or open shelf decor, in a color that echoes the tile so the whole scene feels styled, not accidental.
Why You’ll Love It:
- Adds bold personality without a full renovation
- Easy to change later if your style evolves
- Creates instant visual interest for photos
Best For: Coastal kitchens, contemporary homes, anyone wanting a low-commitment color statement
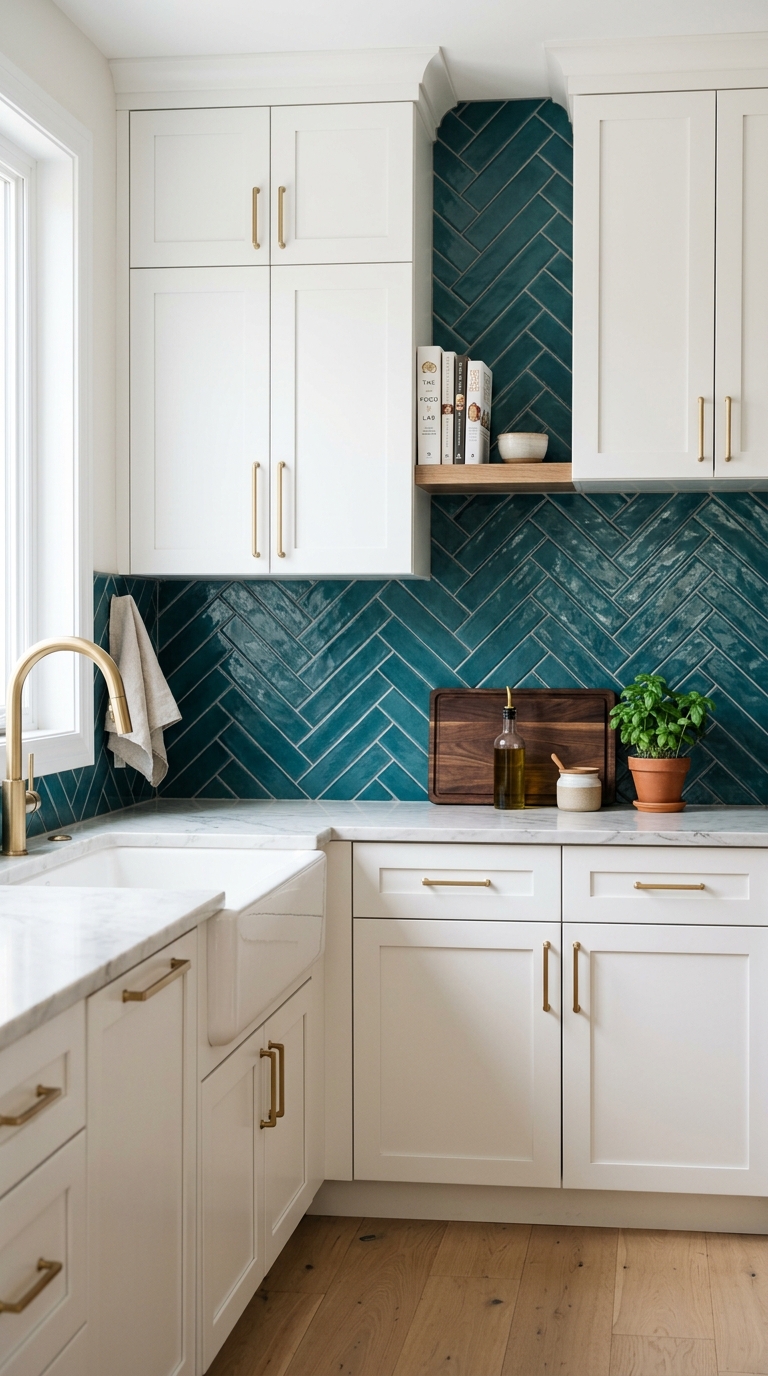
Charcoal or Black Herringbone for Moody Kitchens
For the kitchen that doesn’t want to look like everyone else’s, a charcoal or black herringbone backsplash brings serious drama. Pair it with a lighter grout line, and the contrast sharpens every angle of the pattern, giving the whole wall a graphic, almost architectural quality.
This look leans modern and industrial, and it works surprisingly well in kitchens that already have dark cabinetry or black hardware. Instead of blending in, the backsplash becomes the moody centerpiece that the rest of the room builds around.
A herringbone backsplash pairs beautifully with bold cabinetry — if you’re drawn to moody, statement colors, check out these blue kitchen cabinet ideas for inspiration on balancing color and pattern.
Styling Tip: Add warm-toned lighting nearby to keep the dark tile from feeling cold or flat in photos.
Why You’ll Love It:
- Creates a dramatic, one-of-a-kind focal point
- Pairs naturally with black hardware and dark cabinets
- Feels current for industrial and modern styles
Best For: Industrial kitchens, modern homes, bold design lovers
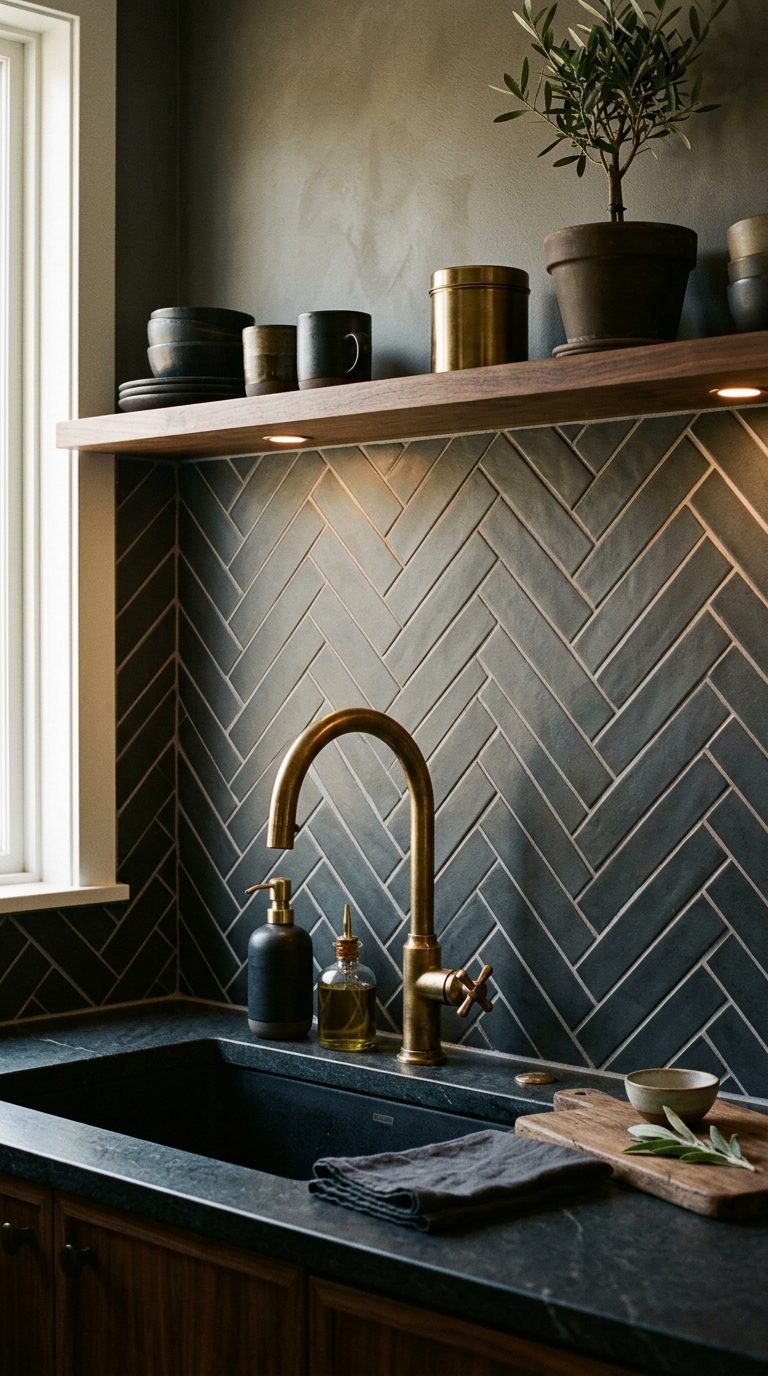
Herringbone vs. Chevron — Which Fits Your Kitchen
Confused between the two? Here’s the one-line difference that settles it: in herringbone, rectangular tiles meet at their ends to form a broken V-shape, while in chevron, the tiles are pre-cut at an angle so the points align into one continuous, unbroken zigzag.
Herringbone tends to feel more traditional and textured, since you can see each tile edge. Chevron reads sleeker and more uniform, which some homeowners prefer for a cleaner, modern look. If you love texture and a slightly imperfect, handcrafted feel, herringbone wins. If you want crisp, seamless lines, chevron might be the better fit.
Styling Tip: Include a close-up detail shot alongside the full kitchen photo so readers can actually see the tile edge difference.
Why You’ll Love It:
- Clears up the most common tile confusion
- Helps you choose confidently before buying tile
- Both options work in nearly any kitchen style
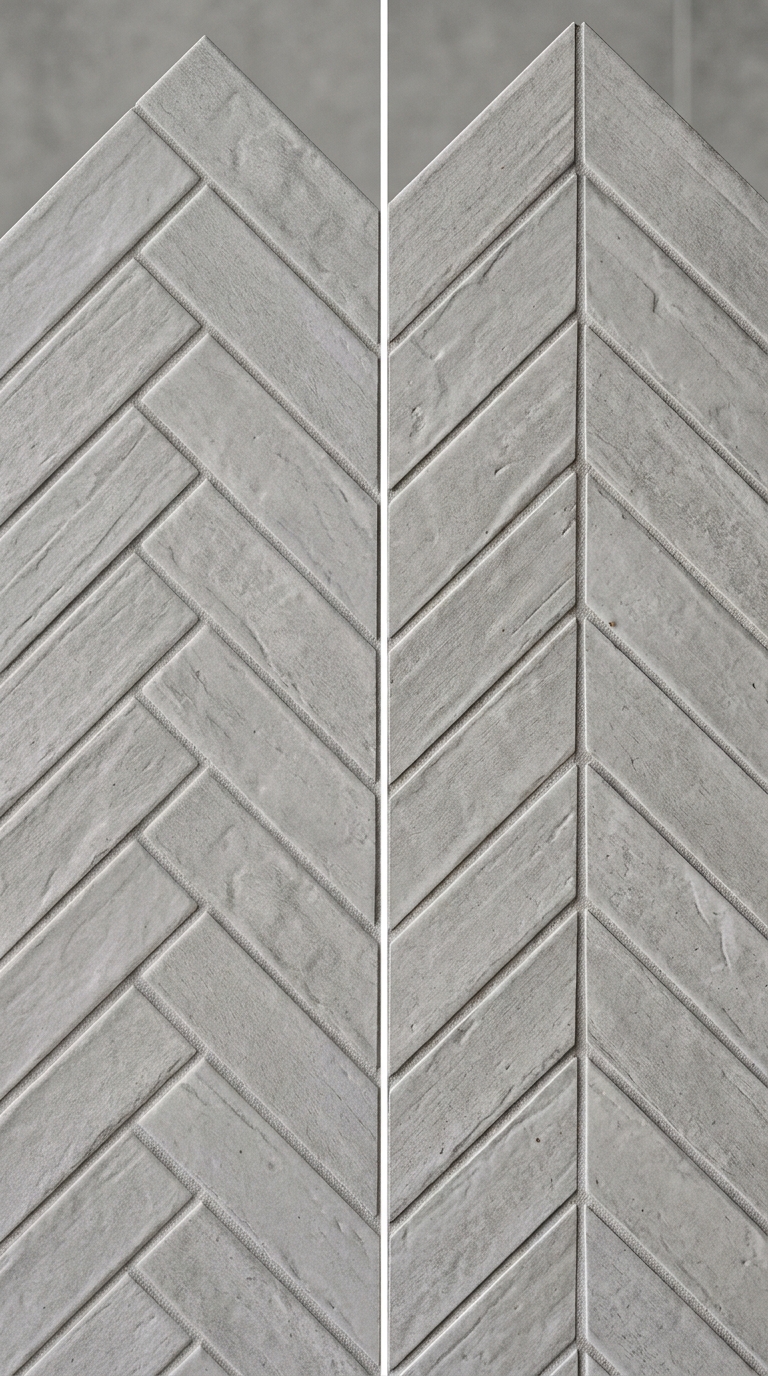
Glass Tile Herringbone for Reflective Walls
There’s something almost magnetic about the way glass tile catches and bounces light. In a herringbone layout, that reflective quality gets amplified since every angled surface throws light in a slightly different direction, giving the whole backsplash a subtle shimmer throughout the day.
Glass is also non-porous, so it resists staining and stays looking clean with minimal upkeep. In a kitchen without much natural light, a glass herringbone backsplash can genuinely help brighten the whole room.
Styling Tip: Shoot with a light source slightly off to the side rather than straight-on to capture the tile’s natural shimmer.
Why You’ll Love It:
- Reflects light beautifully in low-light kitchens
- Non-porous and easy to keep clean
- Adds subtle movement without heavy color
Best For: Kitchens with limited natural light, coastal and modern styles
Quick Designer Tip
If your kitchen faces north or gets limited direct sun, lean toward glass or glossy porcelain herringbone tile. The reflective surface does a lot of the brightening work that paint alone can’t achieve.
Herringbone Brick Backsplash for Farmhouse Kitchens
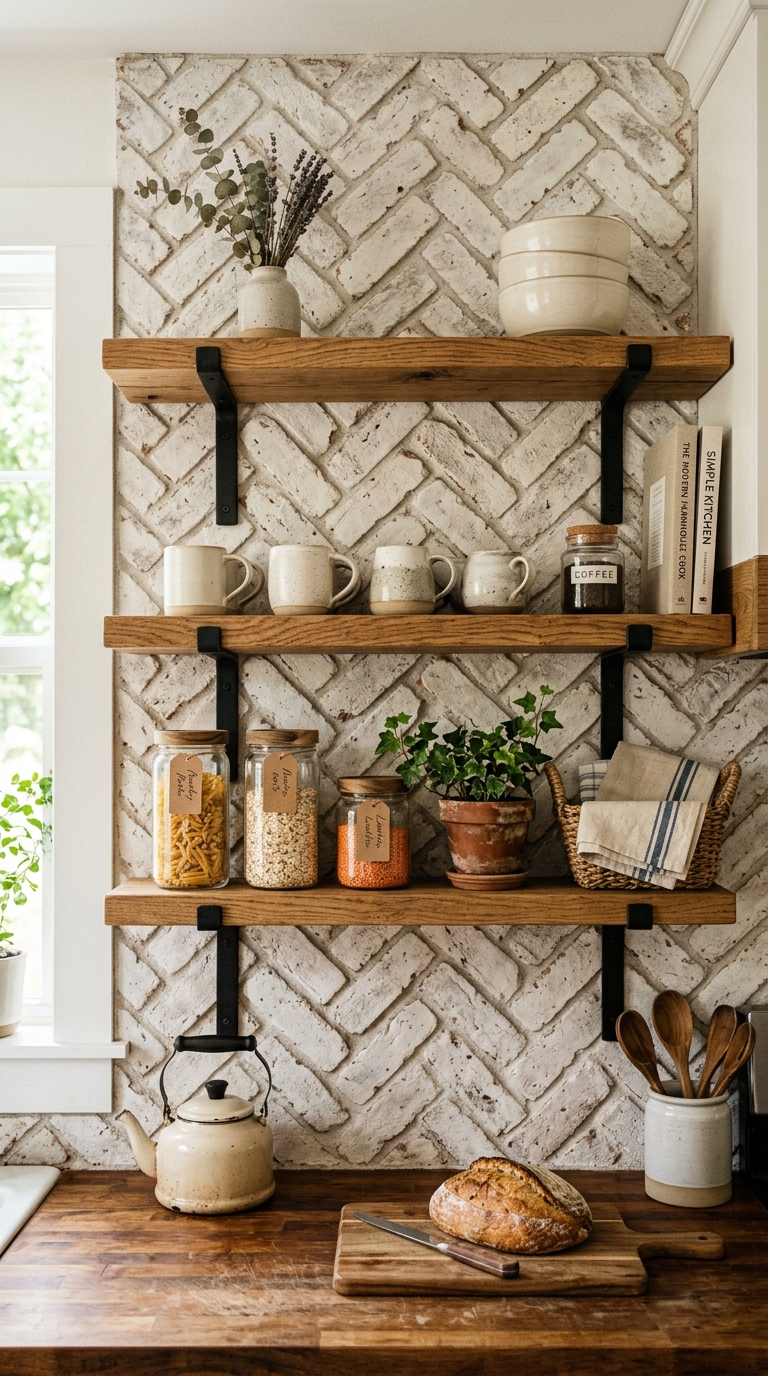
There’s a warmth to brick that tile alone can’t quite copy. A herringbone brick backsplash brings that same rustic charm but arranges it in a pattern that feels more intentional than a standard running bond layout. You still get all the texture and character of exposed brick, just with a more custom-looking finish.
This style pairs naturally with farmhouse, industrial, and eclectic kitchens. A white glaze over the brick lets its natural texture show through while still keeping the space feeling bright and current rather than dated.
Styling Tip: Style open shelving nearby with warm wood and ceramic pieces to reinforce the cozy, rustic feel of the brick.
Why You’ll Love It:
- Brings rustic warmth without feeling outdated
- Works across farmhouse, industrial, and eclectic styles
- Adds texture that photographs beautifully
Best For: Farmhouse kitchens, industrial lofts, eclectic homes
Printed Porcelain Slabs for the Look Without the Upkeep
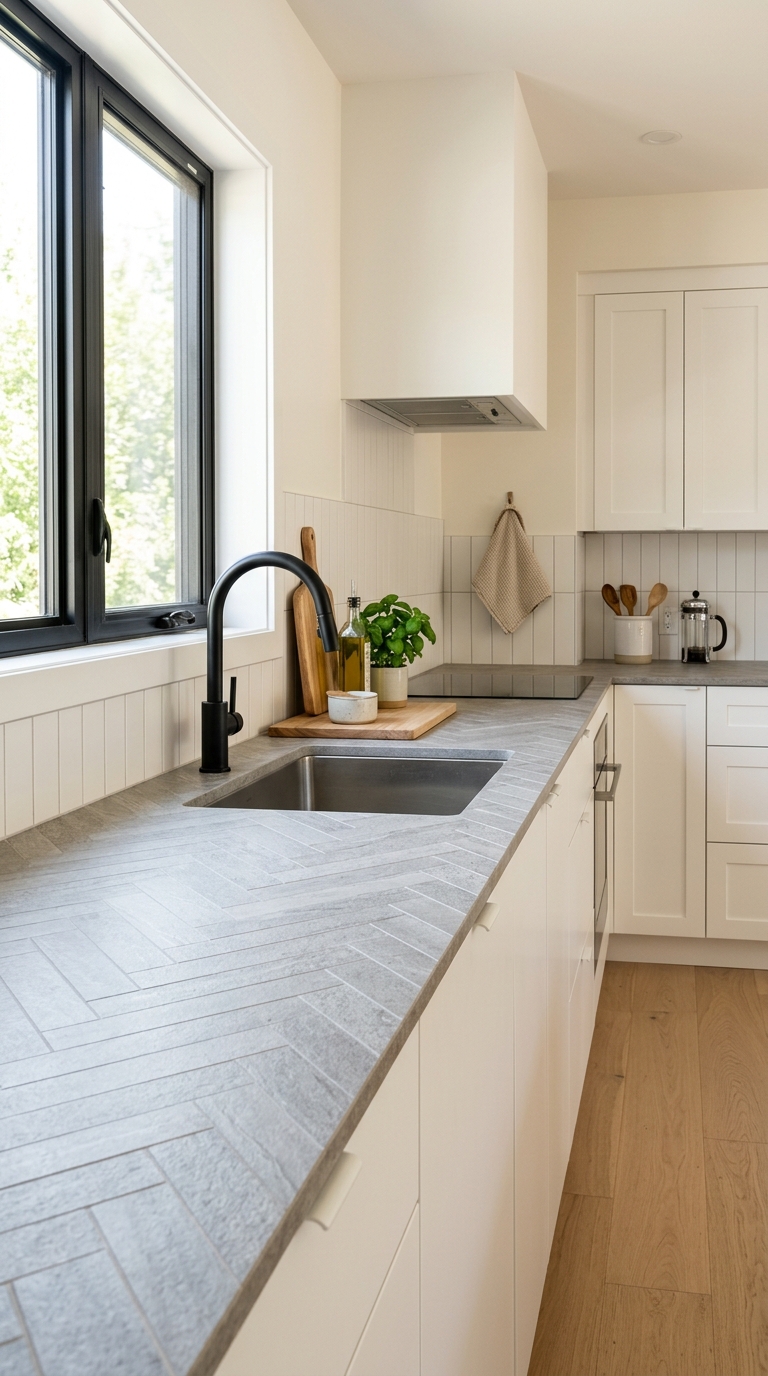
What if you could get the same herringbone effect without dealing with dozens of individual grout lines? Large-format porcelain slabs now come with a herringbone pattern printed directly onto the surface, giving you the visual movement of the layout with almost none of the maintenance.
Since there are far fewer actual seams, cleaning takes a fraction of the time compared to a true tile-by-tile install. It’s a smart option for busy households that want the aesthetic without the extra grout-scrubbing routine.
Pinterest Styling Tip: Highlight the seamless look with a wide-angle shot that shows the full wall uninterrupted by grout breaks.
Best Color Palette: Warm Gray Stone-Print + White Cabinets + Brushed Nickel
Why You’ll Love It:
- Gets the herringbone look with minimal grout to clean
- Faster, simpler installation than individual tiles
- Great for busy households
Best For: Busy families, low-maintenance renovations, modern kitchens
Choosing the Right Tile Size for Your Layout
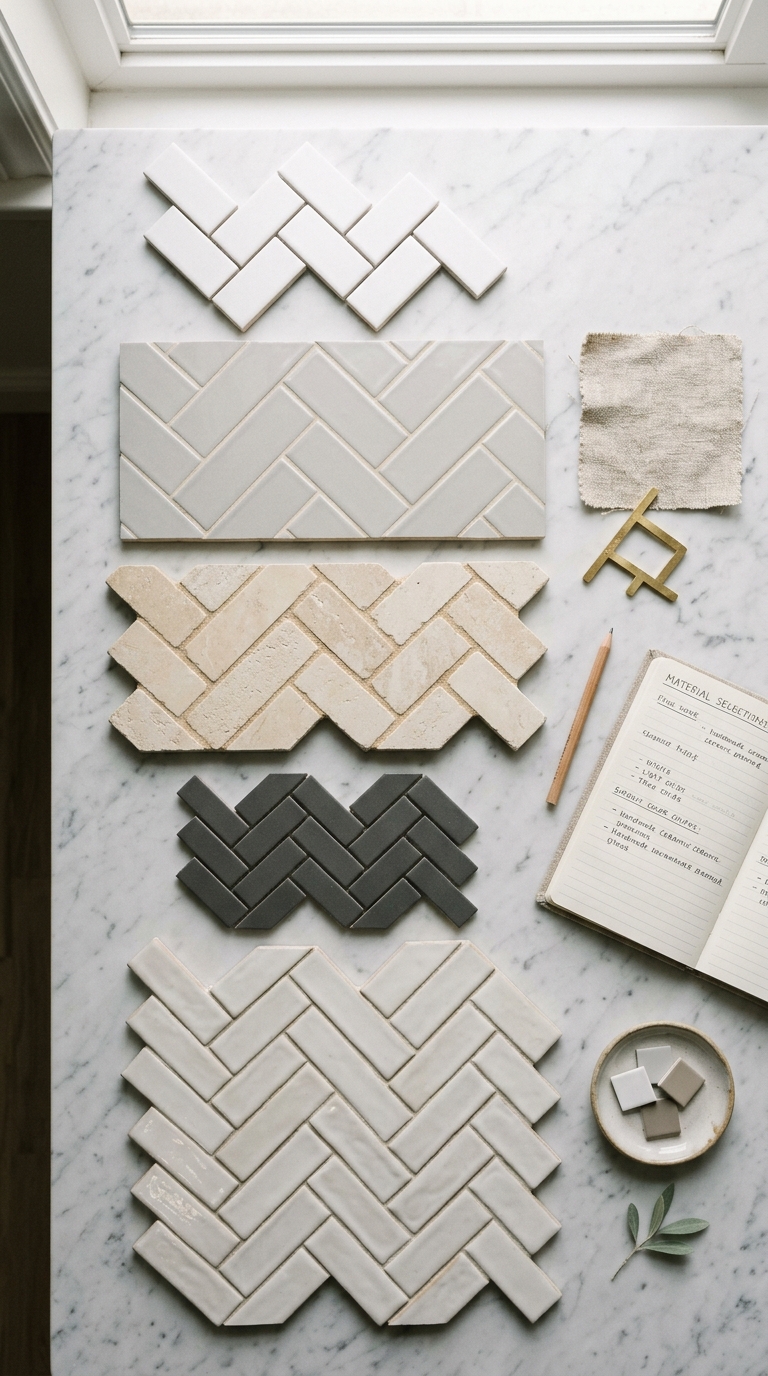
This one small choice ends up changing the entire feel of your kitchen. Smaller tiles, like 2×4 inches, create a dense, busy pattern with lots of visual movement, great if you want an intricate, traditional look. Larger tiles, like 3×9 or 3×12 inches, produce a bolder, more contemporary result with far fewer grout lines.
There’s also a practical side to this decision. Smaller tiles typically mean more cuts, more waste, and a longer install time, while larger formats install faster but show every imperfection in your wall more clearly. Matching tile size to your kitchen’s overall scale and your patience for maintenance makes this decision much easier.
Styling Tip: Place a small tile sample and a large tile sample side by side on your counter and photograph both in the same lighting before deciding.
Why You’ll Love It:
- Helps you avoid a costly sizing mistake before buying tile
- Matches the pattern’s intensity to your kitchen’s scale
- Balances install time against long-term maintenance
Best For: Anyone planning a renovation and comparing tile options
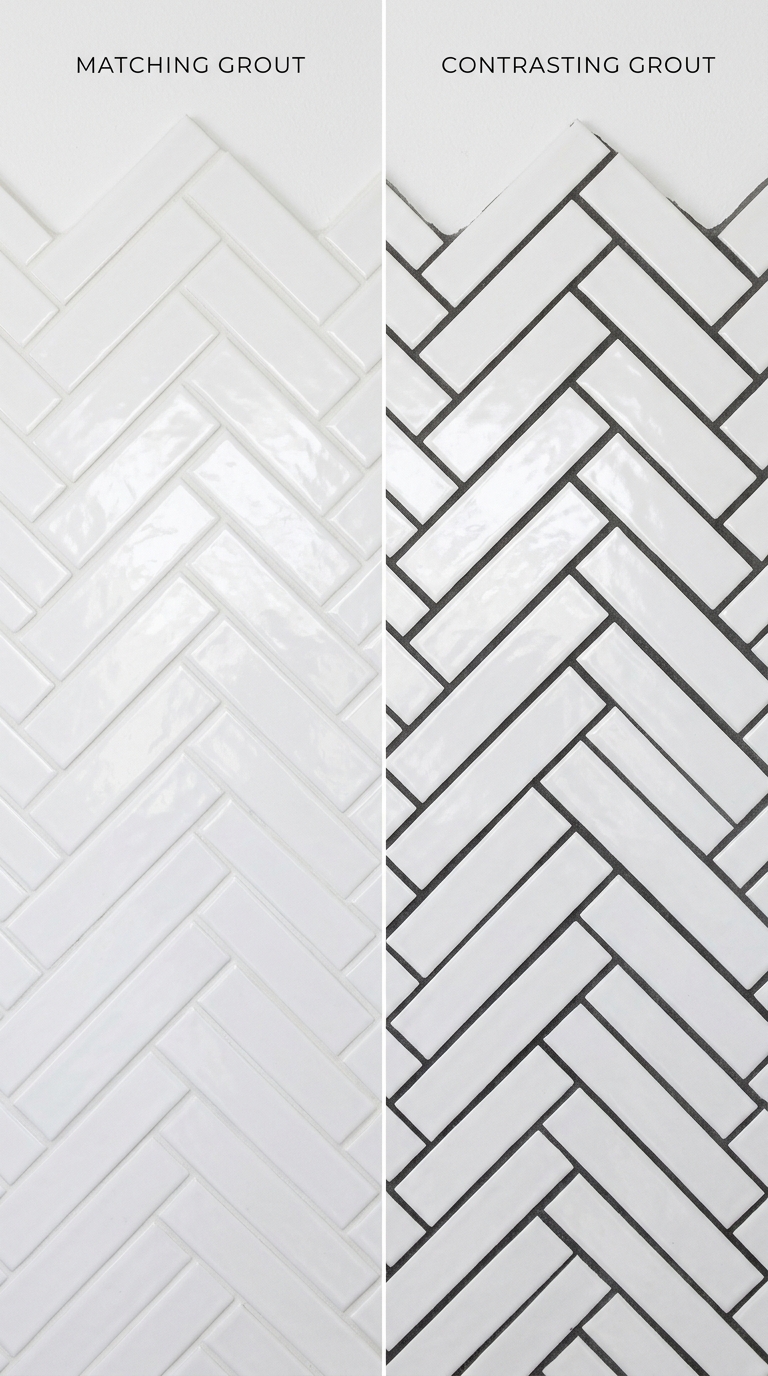
Matching vs. Contrasting Grout
Same tile, two completely different moods, all because of one choice: your grout color. Matching the grout to your tile creates a seamless, flowing surface where the herringbone shape reads as one continuous texture rather than individual pieces. It’s the quieter, more understated option.
Contrasting grout does the opposite. It outlines every single tile and amplifies the zigzag pattern dramatically, which is perfect if you want the herringbone shape itself to be the star. Neither choice is “better”; it really comes down to whether you want the pattern to whisper or shout.
Styling Tip: Take two close-up shots of the same tile with different grout mockups so readers can visually compare before choosing.
Why You’ll Love It:
- Let’s you control how bold the pattern feels
- No extra cost difference between the two choices
- Easy way to personalize a common tile style
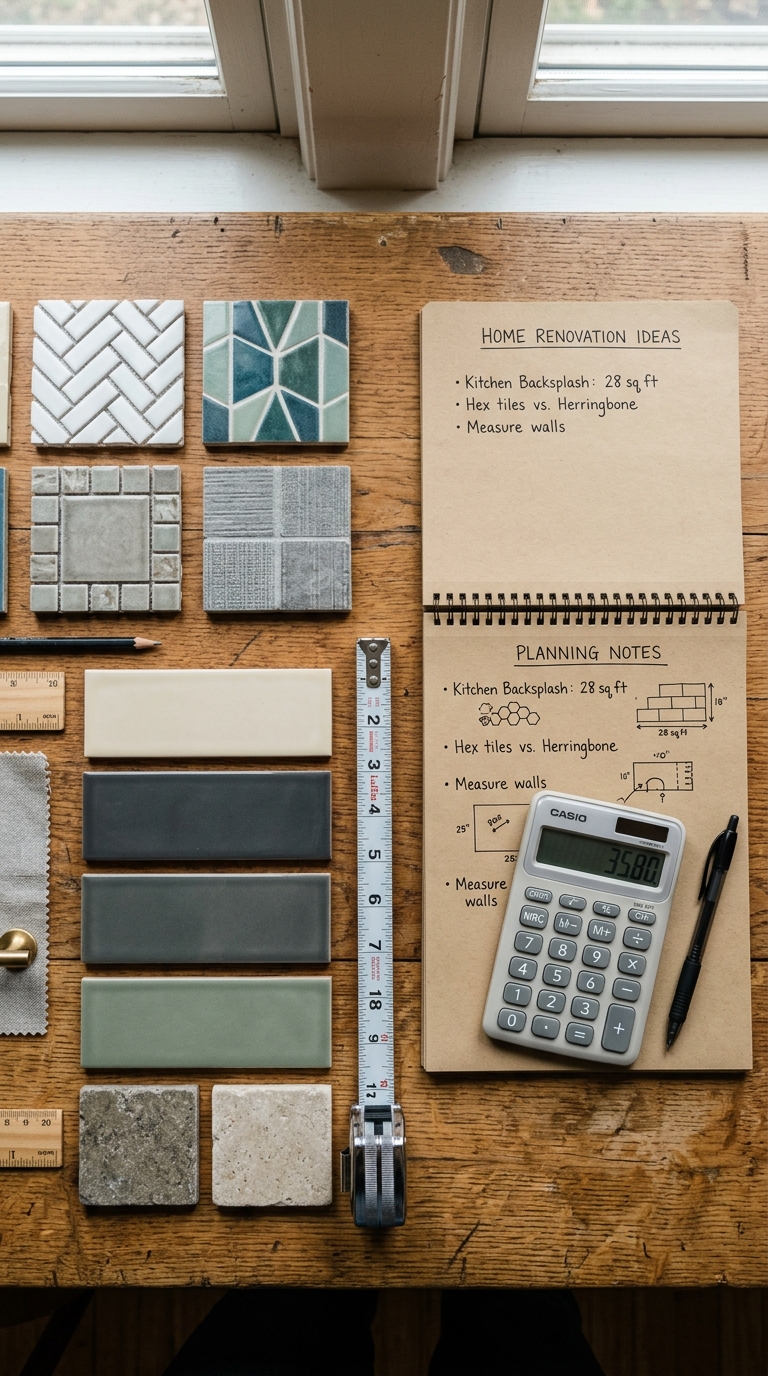
Herringbone Backsplash Cost Breakdown
Here’s the number one question everyone actually wants answered before they fall in love with a Pinterest photo. A standard kitchen backsplash covers roughly 25 to 35 square feet, and costs vary quite a bit depending on material and whether you DIY or hire a pro.
A DIY install with ceramic tile typically runs $150 to $350 in materials alone. Professional installation with ceramic usually lands between $500 and $1,200 total, while marble runs $800 to $2,000, and glass falls between $700 and $1,600. Keep in mind that herringbone requires roughly 15 to 20 percent more tile than a standard layout because of the angled cuts, and labor costs run about 20 to 30 percent higher than a standard running bond pattern due to the extra precision involved.
Styling Tip: Pair this section with a simple cost-range graphic so readers can screenshot it for budgeting reference.
Why You’ll Love It:
- Gives you real numbers instead of vague estimates
- Helps you budget accurately before starting
- Explains exactly why herringbone costs more than standard layouts
Best For: Anyone actively budgeting for a renovation
Quick Designer Tip
Always order 15 to 20 percent extra tile beyond your measured square footage. Herringbone’s angled cuts create more waste than a standard layout, and running short mid-install almost always means a delayed project.
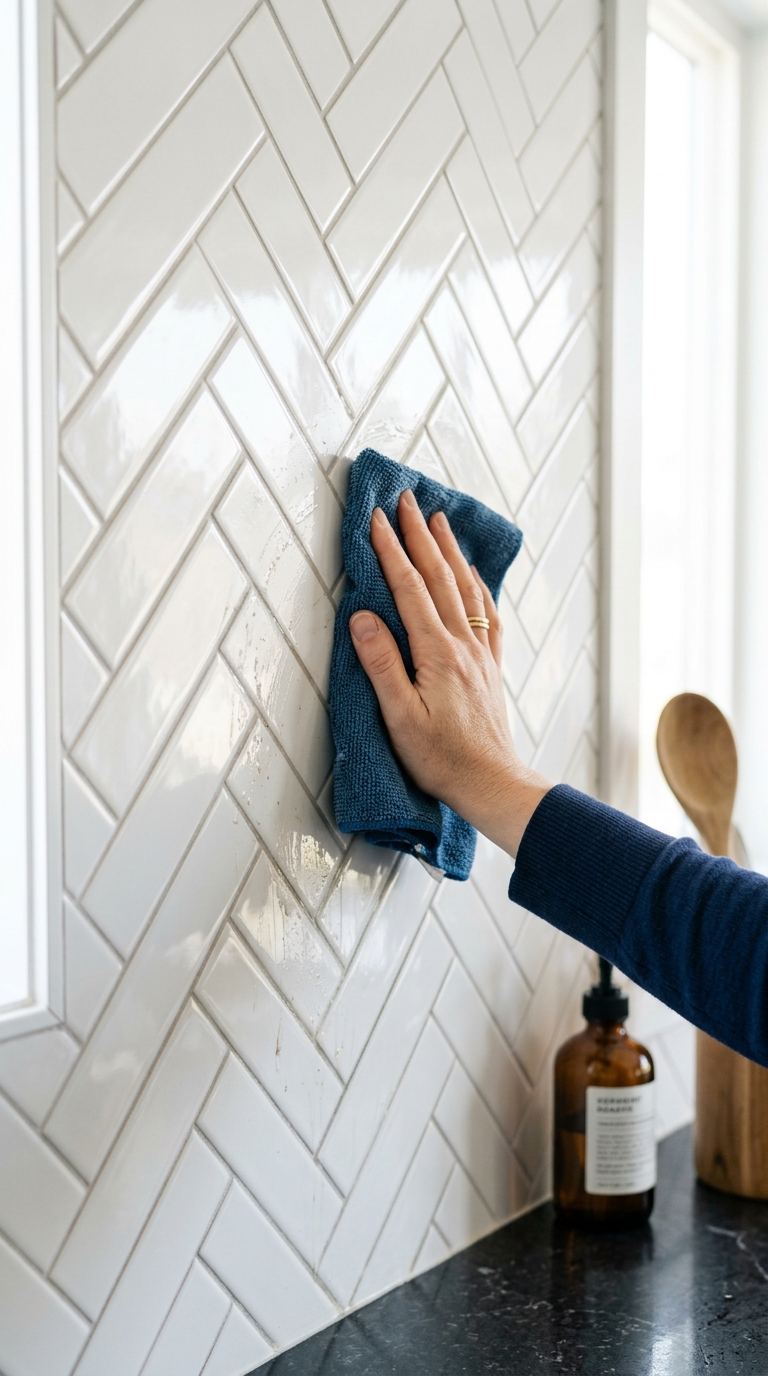
Is Herringbone Hard to Clean? The Reality Check
This is the hesitation that stops a lot of people before they even start, so let’s address it directly. The angled grooves in a herringbone pattern are minimal, and with a smooth tile surface and quality sealed grout, wiping down splatters and grease is just as easy as it is with any standard backsplash layout.
Non-porous materials like porcelain and glass are especially low-maintenance since they don’t absorb stains the way natural stone can. Glossy finishes are the easiest of all to keep clean. Natural stone, like marble, is the one exception; it’s porous, so it needs periodic sealing to stay stain-resistant over time.
Styling Tip: Show a quick “wipe test” moment in your photo, a damp cloth mid-swipe across the tile, to visually reassure readers about upkeep.
Why You’ll Love It:
- Removes a common renovation hesitation
- Confirms most herringbone tile is low-maintenance
- Helps you choose the right sealed finish upfront
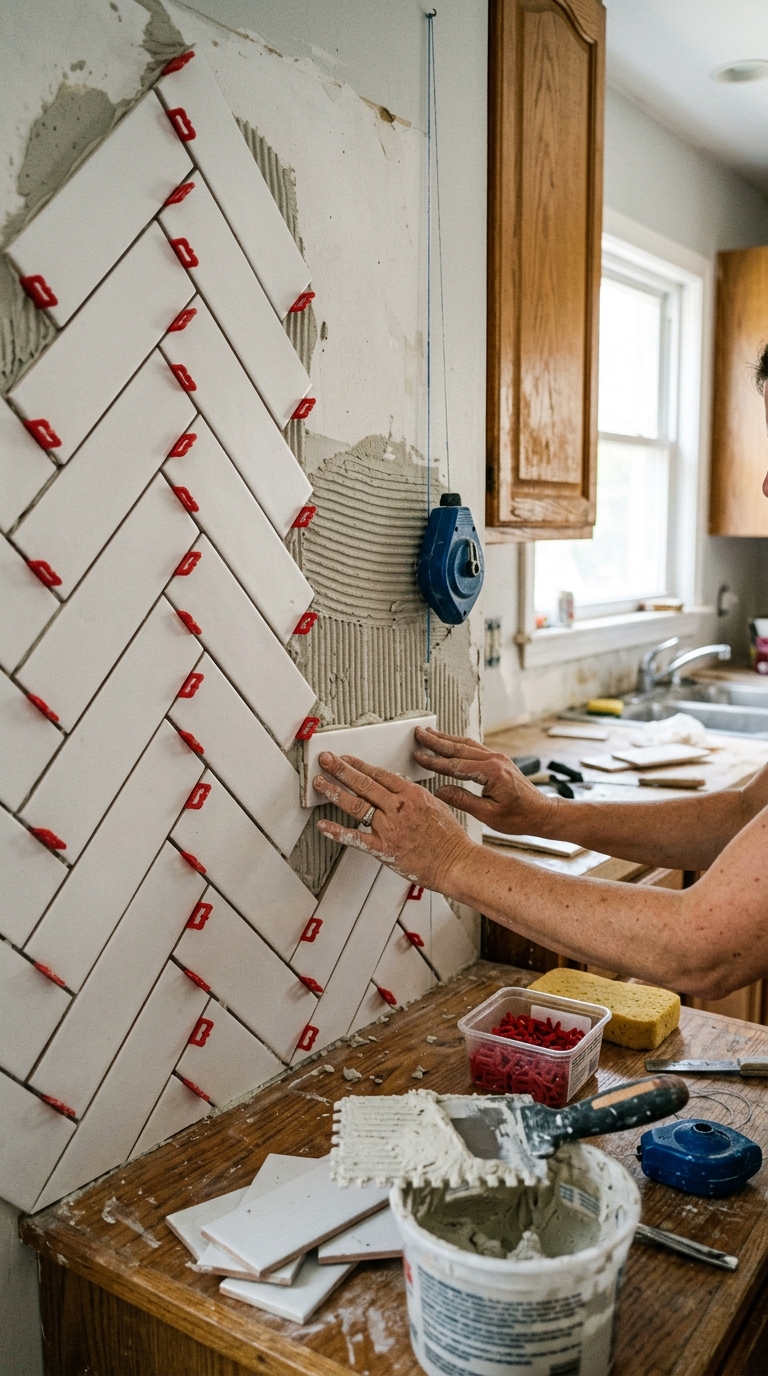
DIY vs. Hire a Pro — Honest Difficulty Level
No sugar-coating this one: herringbone is an intermediate-level DIY project at best. The angled cuts require real precision and patience, and if you’re working with an experienced tile saw and have done tile work before, it’s absolutely feasible to tackle them yourself.
If you’re a first-time DIYer, though, hiring a professional is genuinely the better call. A flawless herringbone install depends on getting that centerline and first row exactly right, since every following tile builds off that starting point. One crooked first tile throws the whole pattern off by the time you reach the edges.
Styling Tip: Include a behind-the-scenes style photo of tile spacers and a chalk line to appeal to the DIY-curious audience.
Why You’ll Love It:
- Set realistic expectations before you start
- Helps you decide honestly whether to DIY or hire out
- Explains exactly why the first row matters so much
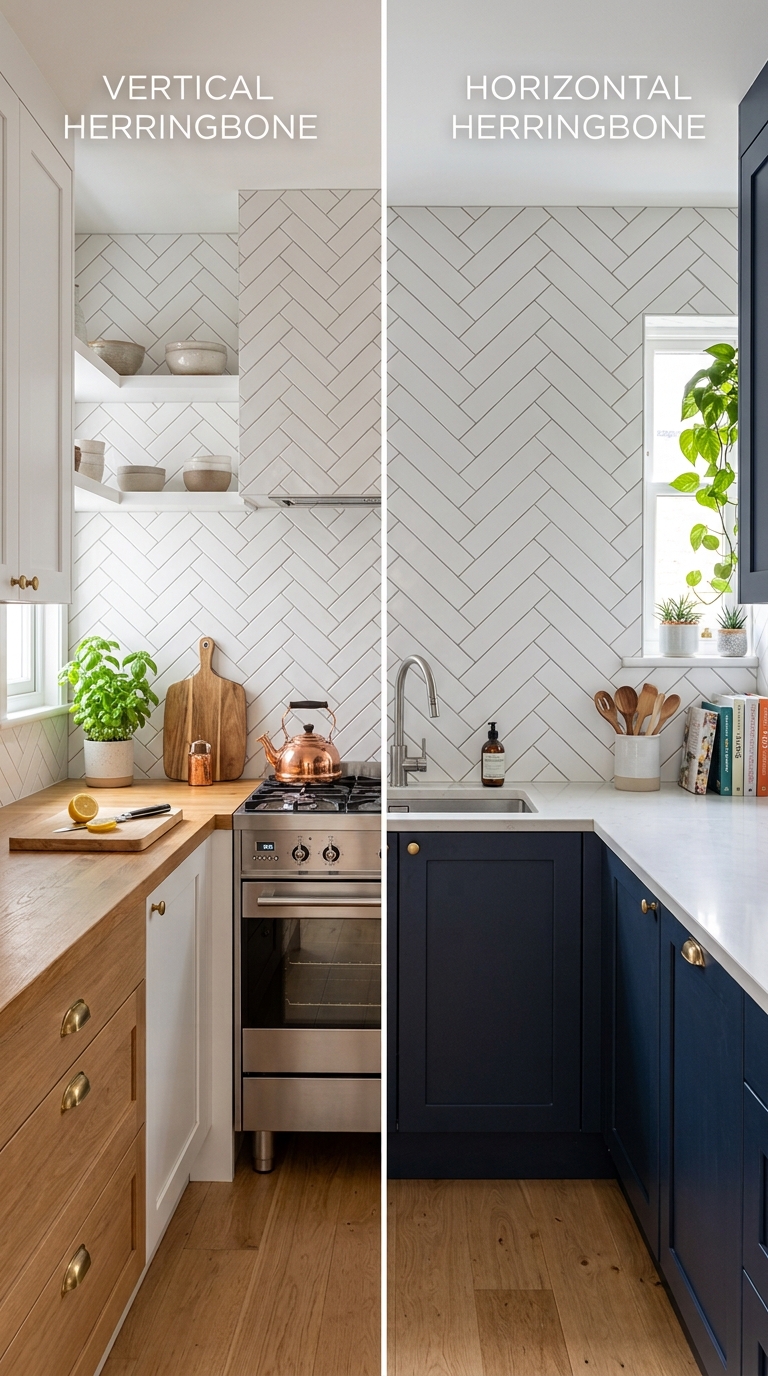
Best Layout Direction for Small vs. Large Kitchens
Here’s the closing decision that ties everything together. In smaller kitchens, orienting the herringbone pattern vertically or running it the length of the room helps the space feel taller and less closed in. In larger kitchens, a horizontal layout across a wide backsplash wall creates a calmer, more balanced flow that doesn’t compete with an already spacious room.
Think of pattern direction as a tool, not just a style preference. The right orientation can genuinely change how a room feels to stand in, not just how it looks in a photo.
Styling Tip: Capture two versions of the same kitchen layout, one styled vertically and one horizontally, side by side for a “which do you prefer” style pin.
Best Color Palette: Soft White + Warm Wood + Brushed Brass
Why You’ll Love It:
- Uses layout direction to solve real spatial challenges
- Helps you make a final, confident design decision
- Works as a practical wrap-up before starting your project
FAQ
Is a herringbone backsplash timeless?
Yes. Herringbone dates back centuries and remains one of the most popular tile layouts today because it balances classic geometry with a look that adapts easily to modern kitchens. Unlike trend-driven finishes, it works with traditional, farmhouse, and contemporary styles alike.
Is a herringbone backsplash more expensive than a standard layout?
Generally, yes. Herringbone requires 15 to 20 percent more tile than a standard running bond layout because of the angled cuts, and professional labor typically costs 20 to 30 percent more due to the extra precision needed. A standard ceramic install runs $500 to $1,200, while marble can run $800 to $2,000.
What’s the difference between herringbone and chevron backsplash?
In herringbone, rectangular tiles meet at their ends to form a broken V-shape. In chevron, tiles are pre-cut at an angle so the points align into one continuous, seamless zigzag. Herringbone reads more traditional and textured, while chevron looks sleeker and more uniform.
What’s the best tile size for a herringbone backsplash?
It depends on your kitchen. Smaller tiles (2×4 inches) create a dense, intricate pattern that suits traditional kitchens, while larger tiles (3×9 or 3×12 inches) give a bolder, more modern look with fewer grout lines and faster installation.
Is herringbone backsplash hard to clean?
No. With a smooth tile surface and quality sealed grout, a herringbone backsplash is just as easy to clean as any standard layout. Non-porous materials like porcelain and glass are especially low-maintenance, while natural stone like marble needs occasional resealing.
Can I install a herringbone backsplash myself?
It’s possible if you’re an experienced DIYer with a good tile saw, since the angled cuts require precision and patience. First-time DIYers are usually better off hiring a professional, since one uneven starting tile can throw off the entire pattern.
Does a herringbone backsplash make a small kitchen look bigger?
Yes. The diagonal movement of the pattern creates visual depth and prevents walls from feeling flat, which can make a small kitchen feel more open and dynamic. A vertical layout adds this effect even further by drawing the eye upward.
Conclusion
You’ve spent weeks picking the right cabinets. You went back and forth on countertop samples more times than you’d like to admit. But once everything’s installed, something still feels off, and it’s usually that plain wall behind the sink or stove.
That blank space is doing more damage to your kitchen’s look than you’d think. It’s the one spot where you can actually add texture and movement, and a flat, straight-laid tile just doesn’t do the job. That’s where a herringbone backsplash comes in.
Instead of tiles sitting in boring straight rows, herringbone tile zigzags across the wall in a V-shaped pattern that catches the eye immediately. It looks custom, even when the tile itself is affordable, and it works with almost any kitchen style, from farmhouse to modern.
In this guide, you’ll find 17 herringbone backsplash ideas covering different tile materials, colors, and layouts. You’ll also get real cost numbers, honest maintenance info, and a clear answer on whether this is a DIY project or one to hand off to a pro. By the end, you’ll know exactly which herringbone style fits your kitchen best.